THE MUD HOME
  • Home
  • Building
    • Earthbag >
      • Rubble Trench Foundations
      • Earthbag in Extreme Weather
      • Earthquakes and earthbag
    • Earth Plaster
    • Using Lime
    • Cob
    • Straw Bale
    • Wattle and Daub
    • Inspiration
    • Off-Grid Living >
      • Off-Grid Prep Course
    • Mud Building Blog
  • Books
    • Dirt Witch
    • Mud Ball
    • Mud Mountain The Book
    • MUD BUILDING PDF PACKAGE
  • About
    • Contact
    • Mud Home Facebook Group
  • COURSES
    • ATULYA's In Person Workshops 2025
    • Perfect Earth Plaster Online Course
    • Lime for Beginners Online Course
    • MUD BUILDING PDF PACKAGE
    • The Off-Grid Roadmap
    • Consultation
  • Blogs
    • Mud Home Turkey
    • Barn Life in Spain
  • My Projects
    • The Earthbag Home in Turkey
    • The Barn in Spain

earthbag building

I love earthbag. It's achievable for novices, ridiculously strong, and inexpensive. My detailed, illustrated PDF, and free email course, will give you the whole story.
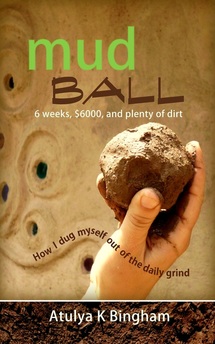
Download the Free Earthbag PDF

How I Built an Earthbag Round House


Picture
Picture
Picture
My earthbag house took six weeks to build and cost about US$5000 to make (back in 2012 in Turkey). Nearly all that money went on labour, the roof rafters and my beautiful juniper floorboards. There was no power or running water on the land.

I didn't even know what a joist was when I started this project. I used to say, "If I can do it, anyone can." But in hindsight perhaps I think underestimated myself a bit. It's true, you don't need prior knowledge. You can learn the skills. But you do need determination, stamina, and some decent friends won't go amiss either. 

The True Story

If you'd like the dirt on what happened during those six frantic weeks while I tried to get my house up, it's all in Mud Ball.
Picture
Start Reading

​
"Beautifully written and inspiring."
The Owner Builder Magazine

​"If you've ever thought about going off-grid...this book is a must read."
Fethiye Times

"A wonderful, heart-tugging story."
Dr Owen Geiger, Natural Building Blog.

The FREE Earthbag PDF

For the nuts and bolts of earthbag building, sign up for the free PDF.
20 pages of information and photos.
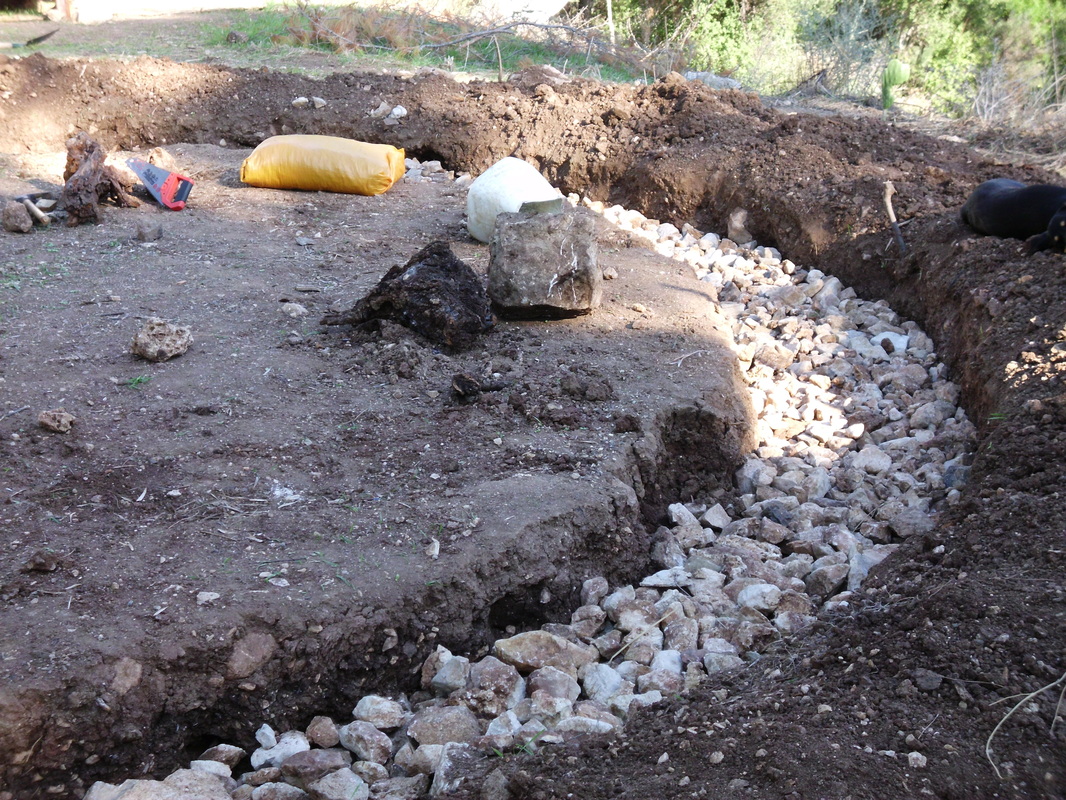
Picture
Get the free PDF

Here's a Summary of How We Built My Roundhouse in Turkey

I'm not a structural engineer or an architect, and this brief earthbag summary isn't a manual. This is simply an article relating roughly how I built my house, and a few observations I have made since. My little earthbag house is still standing (July 2023) over ten years after it was built, and after many earthquakes.

Step 1 - Designing an Earthbag Home

Picture
First I had to decide: Was earthbag for me? Because it's not for everybody or every climate. If you don't actually have any clayey earth on your land then that means you'll have to transport it in. Aside from the practical implications of that, it also detracts from the ecological benefits. Earthbag needs clayey soil, a bit like normal adobe, or cob. The difference is, the clay dries in bags after the house is built.
​
Many people have asked me, "Why use the bags?"
The earthbag system was invented by an Iranian, Nader Khalili, as sustainable, affordable, and earthquake-proof housing. Living in Turkey where serious earthquakes kill thousands on a regular basis, this was a deal  breaker. The bags combined with barbed wire give the house incredible strength compared with other types of eco-building, which make these structures almost invincible.
Earthbag is PERFECT for:
  • Hot, dry climates
  • Earthquake zones
  • Roundhouses
Picture

Compare earthbag, cob and straw bale

Advantages over cob
  • If built correctly, earthbag can withstand flash floods, as the bag structure and the barbed wire combined create a solid framework for the mud. Cob walls are known to disintegrate in severe flash-flooding.
  • Much faster to get the structure up. 

Disadvantages compared to cob
  • During building, lifting the earthbags to higher levels and tamping require a fair amount of physical strength.
  • Takes longer to finish the interior than a cob house.

Advantages over straw bale
  • Great for roundhouses.
  • Strength.
  • Not really impacted by mold and damp.
  • Good thermal mass (retains the heat/cold for long periods). 

Disadvantages compared to strawbale
  • Earthen walls have poor insulation value compared with straw bale. So straw bale houses can be heated quickly, but lose that heat faster. Earthen walls take longer to heat up, but stay hot for longer.

Shape

Picture
Picture
Round
Earthbag is ideal for roundhouses. If you're in a seismic area like I was in Turkey, then round is the way to go. Round is not only aesthetic and soothing to the spirit, but is also the strongest shape of structure you can build.  Cars have been known to hit earthbag roundhouses with no more than plaster damage. Mine has survived many major earthquakes.

Square Earthbag?
If you're dead-set on corners, then it's not as straight forward with earthbag. You will need to plan buttresses, and research well before starting. Straight walls are weaker than round ones too. See the brilliant earthbag building blog for more details.

You could also have a post-and-beam structure and 'fill in the gaps' with earthbags. Again this needs more know-how and technical ability. On the plus side, building laws in certain countries may approve earthbag buildings that way (which is, if you know a bit about it, completely absurd as building in this way weakens an earthbag structure, but you get used to this kind of nonsense when dealing with officialdom in natural builds). 

Plans
I didn't make a single drawing before I started, and adjusted the design as I went along. It worked! But again, that's not an indication that everyone should do the same. I have later understood, I seem to have an intuitive feeling for building and structural strength that other people might not have. In addition, there are many advantages to pre-planning, especially for shelves, alcoves, tables or seats for roundhouses, electric and water fittings, etc.

If you're the planning type, take a look at the late Owen Geiger's dream homes site to give you some ideas.

KEEP IT SMALL. Don't say I didn't warn you. Even a small structure can be exhausting, so if you don't know what you're getting into (and even if you do) start small. You can always add more rooms or structures later. Of course there'll always be an exception to this rule. I have seen one or two folk manage large builds, but they were either ex-military or had an awful lot of labourers helping. And they still said they wish they'd built smaller round structures at the end of it.

My earthbag house was just a one-room circle with a three-metre radius and I'm very glad I didn't try anything bigger.


Step 2 - Foundations

Picture
Rubble trench.
Picture
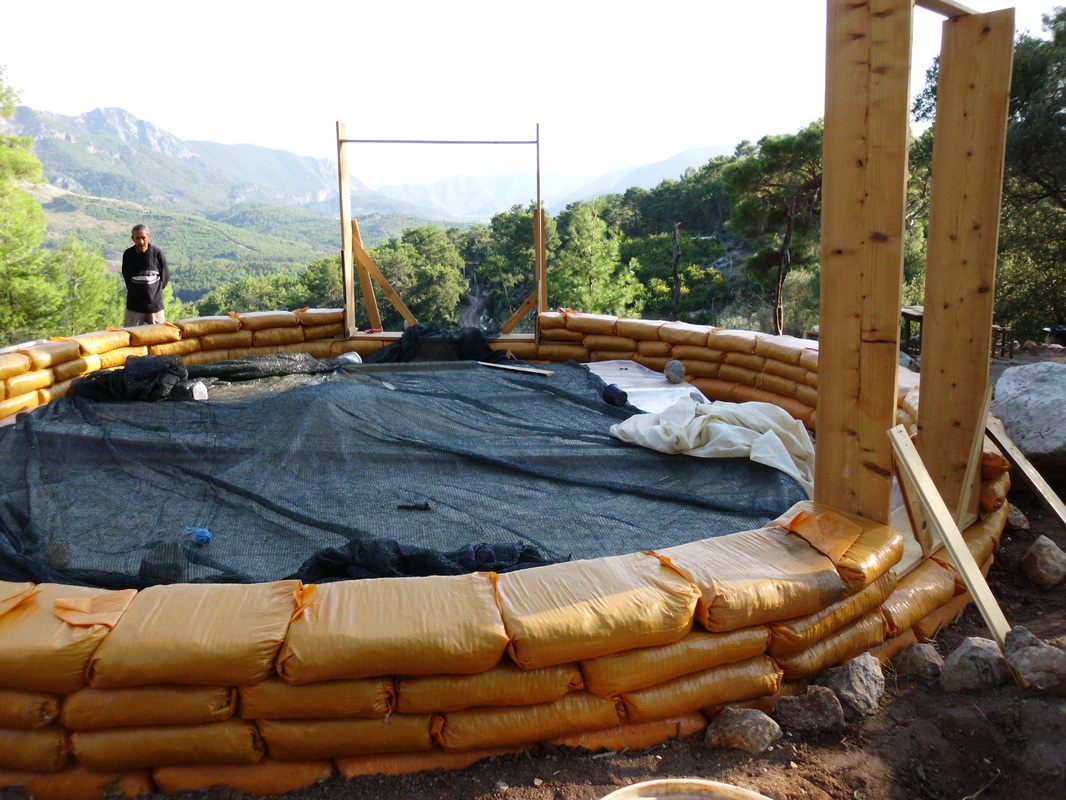
First layer of gravel-filled bags.
No one believed a rubble trench foundation system would work. But if you live in an area that experiences a lot of rainfall nothing beats it. See Gravel Foundations for details.

This house's foundation system was documented in detail in the Natural Building Blog.

Let me take you back to the beginning . . .

"Why would anyone move into a tent and live on a mountain for eight months? A mountain with no power, no water, and no permanent shelter to speak of.

Something has to have gone wrong.

The trouble all began with a dream, and in many ways it ended with one too. Only it was a dream I had never planned. One I hadn't expected at all . .
."

The Mud Mountain Blog

​Step 3 - Walls

Picture
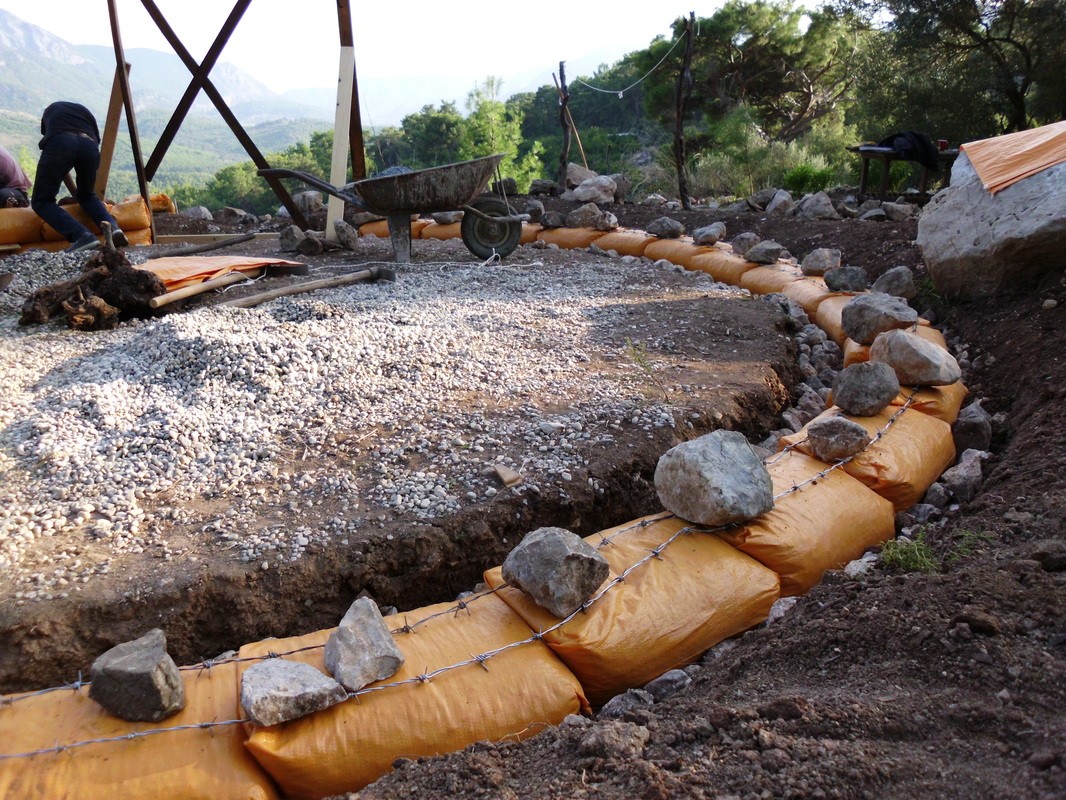
Barbed-wire between each layer of bags.
Picture
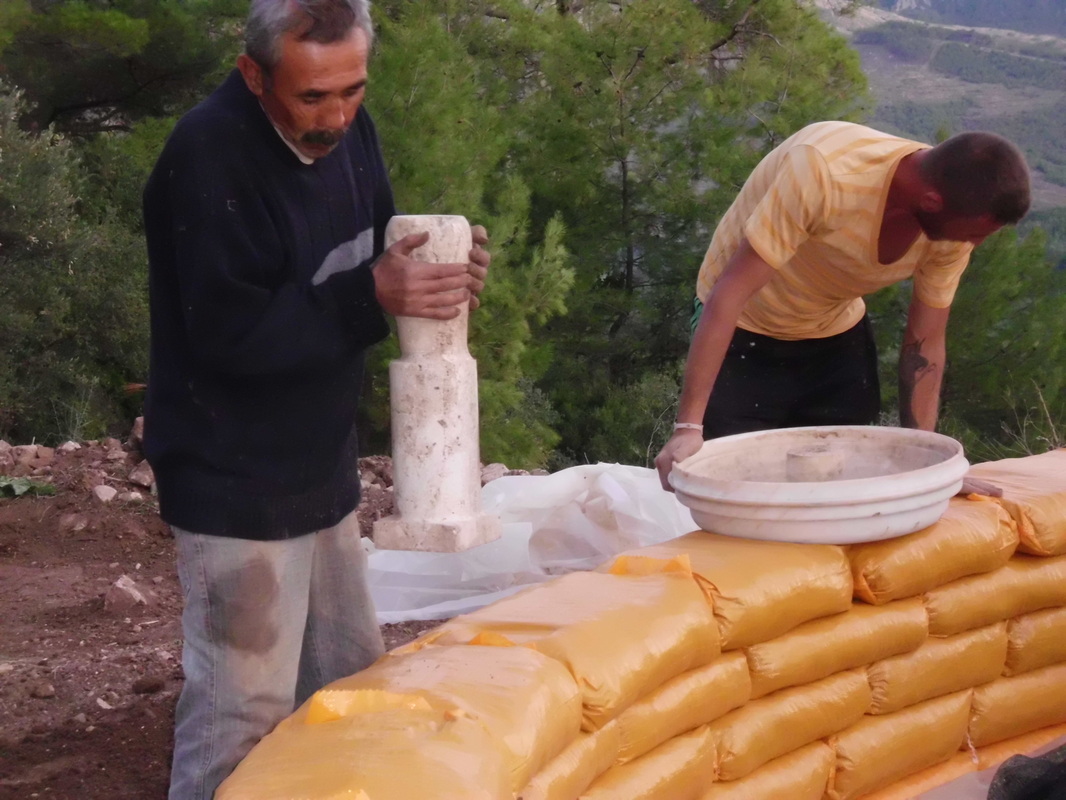
Tamping is key. It's also hard work.
1. Try to keep your walls straight (easier said than done on a round house). Use a plumb-line to check. 

2. First of all, take an earthbag and fold the corners in.

3. Fill it with a specified amount of damp/slightly wet earth.

4. The first bag in the circle needs to be nailed shut. The second bag is laid up against the first so that the two openings are facing each other. The first bag holds the second shut.

5. Keep laying bags until you finish a circle.

6. When the circle is complete, take something heavy and flat and tamp the entire layer until the soil is nicely compacted and the bags snug. Tamping is key; it's also damn hard work.

​Step 4 - Windows and Doors

Picture
Adnan looking far too happy at the beginning of the window debacle.
Picture
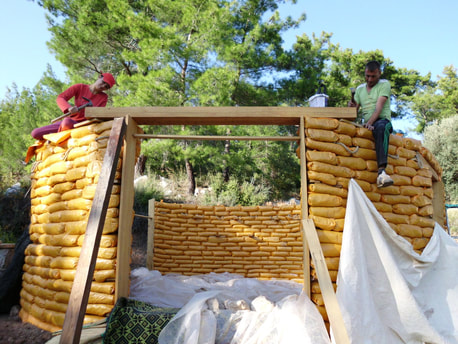
Fat lintels are easier than arches.
My windows were a disaster from start to finish, which is why I didn't put up photos. One thing I can say is, however badly you mess up, there usually seems to be a solution.

1. Making moulds is the best way to ensure your windows stay in shape. Bear in mind that as you tamp your bags, they are rammed up hard against frames, and will bend or warp them unless the frame is incredibly thick.

2. Moulds can be made from scrap wood if it's lying about. The only trouble with the moulds is, they are devils to get out. You can also use strawbales, barrels or drums, wagon wheels, and tyres.

3. You can make beautiful arched windows with earthbags that are super-strong. 

4. Inserting wooden anchors between layers of bags is a useful way of creating somewhere to bang your window frames in once the walls are finished.

5. If your windows or door frames are not arched, you need nice fat lintels instead. This is definitely easier, but uses more timber.

Serious about Earthbag?
For more information on windows and doors, and if you are really serious about earthbag building, I recommend
 
"Earthbag Building: Tools, Tricks and Techniques" by Kaki Hunter and Donald Kiffmeyer.

​​Step 5 - The Roof

Picture
If it's a roundhouse then there are some nice options for roofs.
1. You could try a reciprocal roof.
2. Or an earth (living) roof.
3. We laid two fat (10 x 20cm) beams across the roof and laid 5 x 15cm joists at 40cm intervals over them. To prevent the ends of the joists sinking into the bags we laid them over wood slats (2 x 25 x 40cm)
4. When you lay earthbags over these slats to fill in the gaps, the roof becomes mighty secure.
5. If you are really paranoid, or suffer tornadoes, you can tie or cinch the joists down as well.
Picture
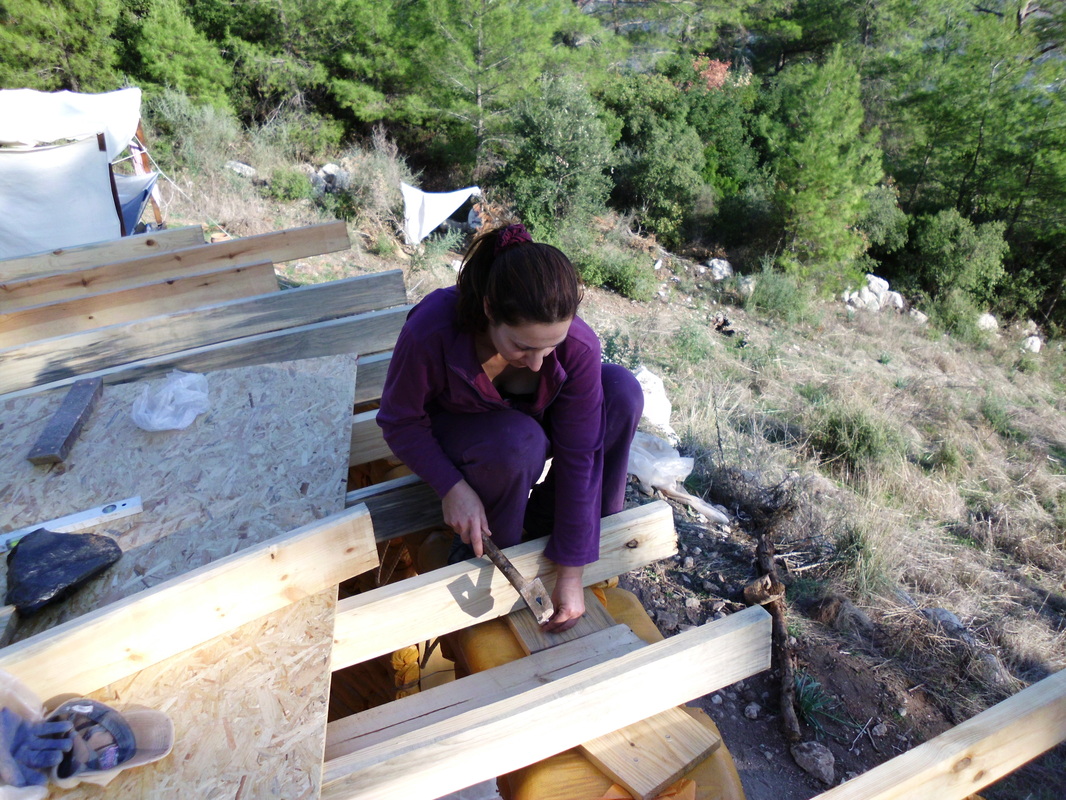
Joists laid on thick slats to prevent them sinking.
Picture
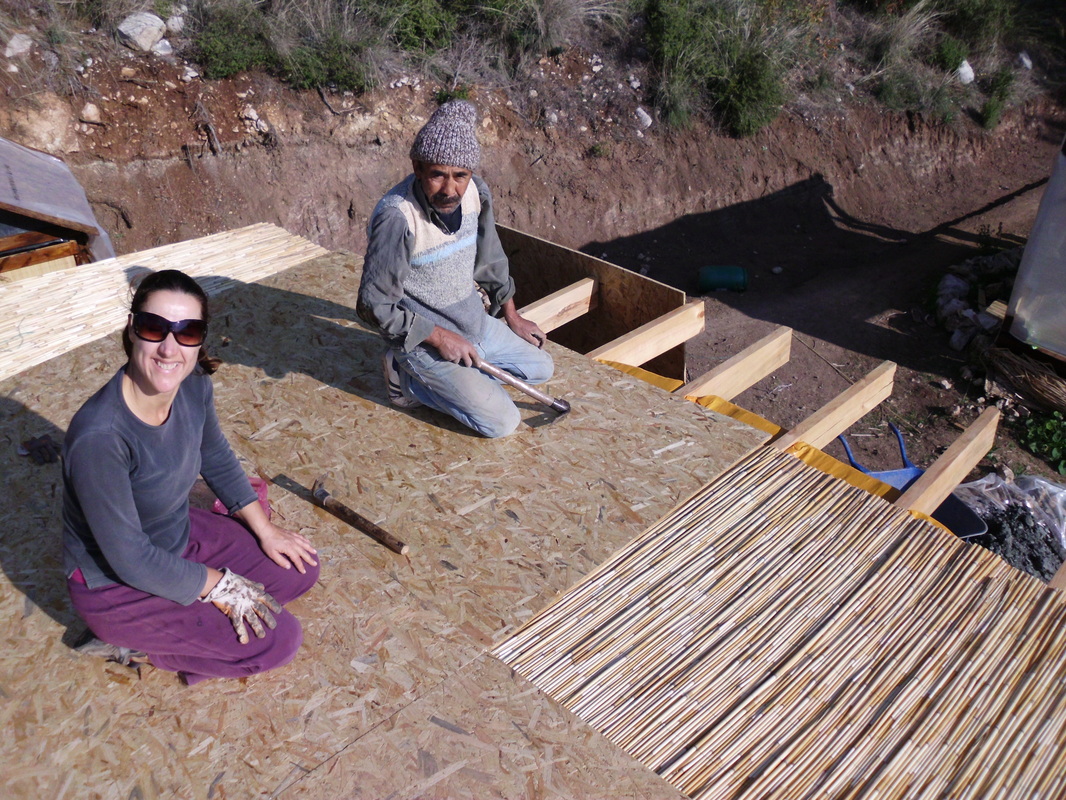
Celal and I getting the plywood down.

​Step 6 - Plaster

Picture
If at first you don't succeed . . .
Picture
It took us just six weeks to get the entire house up, but 18 months to plaster it! Earth plasters are an acquired skill and you'll need to practise a fair bit to get the mix right.

Read all about the ins and outs of earth plaster HERE
.

This is just a brief summary of how I built my earthbag house. If you'd like more details and photos then get my free earthbag building PDF below.
Get your free earthbag building PDF
Picture
If you benefit from this free information, please consider supporting the Mud Home on Patreon so that it can continue. BENEFITS FOR PATRONS INCLUDE: Email priority, my private Facebook group, review copies of my books, sneak previews of courses, Q & As, priority for courses, volunteer places, and workshop hosting.
Picture
Disclaimer: All the content in The Mud Home website is provided for informational purposes only. The author undertakes no responsibility for any person or entity who chooses to use the information on this website. It is not intended to be a standard and should not substitute for the exercise of good engineering judgment by engineers. It is the user’s obligation to make sure that he/she uses the appropriate practices and consults the appropriate experts when building. It is the user's obligation to make sure they are following health and safety guidelines. The author is not responsible for any accidents, injuries or damages to persons or property incurred while using the information presented in this website.

Some blog articles refer to the use of lime. Please note, lime is caustic and can cause burns. Read The Mud Home guide to using lime safely here.

EARTHBAG BUILDING PDF
EARTH PLASTER GUIDE
BOOKS
Newsletter
About Atulya
Privacy Policy

SUPPORT

Picture
Picture
The Mud Home takes many hours a week to run, and costs a lot to sustain. If you find this site useful or inspiring, please consider supporting it so that it can continue.
Picture

Many thanks to all those who've already become Mud Sustainers.

The Mud Home  Copyright © 2013  Atulya Kerry Bingham
  • Home
  • Building
    • Earthbag >
      • Rubble Trench Foundations
      • Earthbag in Extreme Weather
      • Earthquakes and earthbag
    • Earth Plaster
    • Using Lime
    • Cob
    • Straw Bale
    • Wattle and Daub
    • Inspiration
    • Off-Grid Living >
      • Off-Grid Prep Course
    • Mud Building Blog
  • Books
    • Dirt Witch
    • Mud Ball
    • Mud Mountain The Book
    • MUD BUILDING PDF PACKAGE
  • About
    • Contact
    • Mud Home Facebook Group
  • COURSES
    • ATULYA's In Person Workshops 2025
    • Perfect Earth Plaster Online Course
    • Lime for Beginners Online Course
    • MUD BUILDING PDF PACKAGE
    • The Off-Grid Roadmap
    • Consultation
  • Blogs
    • Mud Home Turkey
    • Barn Life in Spain
  • My Projects
    • The Earthbag Home in Turkey
    • The Barn in Spain