THE MUD HOME
  • Home
  • Building
    • Earthbag
    • Earthquakes and earthbag
    • Rubble Trench Foundations
    • Off-grid how to >
      • Off-Grid Prep Course
    • Earth Plaster
    • Lime Wash
    • Mud as Mortar
    • Wattle and Daub
    • Mud Building Blog
  • Books
    • Dirt Witch
    • Mud Ball
    • Mud Mountain The Book
    • An Earthbag House in 7 Days?
  • About
    • Contact
  • Learn Mud
    • Courses
    • Mud Building PDF Package
    • Other Projects
  • Earth Whispering
    • Join the Earth Whispering Exploration
    • MUD MOUNTAIN

join my free
earth plaster mini course


Natural clay or earth plaster is wonderful, but can be trickier than it looks.
Sign up for my free earth plaster mini course.

Sign up
Tweet

How to Make Perfect Earth (or Clay) Plaster

(Earthen plaster can be called clay plaster, because it's the clay that is the binding agent in the mix).

Earthen plaster, as I have learned, is not simply a matter of getting your boots on and stomping about in a trough of clay. If you want it to look half way decent, it's a finely-honed skill. It took me just six weeks to get the structure of my earthbag house up in Turkey, but nearly two years on and off to perfect the plaster. But heck, who cares? Earthen plaster is the most satisfying, beautiful, tactile, cosy and inexpensive material I've ever used. If it's made correctly it's incredibly tough too. Cob, and wattle and daub, homes that are hundreds of years old are still standing in the UK. I doubt Portland cement houses will ever be able to boast the same durability.

So how to make it?
Picture
The freedom of earthen plaster
How to make earthen plaster?
I used to have a recipe on this page, but I’ve removed it because I genuinely think it’s misleading and a total waste of time to follow someone else’s recipe. I’ve made earth plaster in three different countries, and numerous regional locations and climates. Every time the mixture is very different. Sometimes I've added extra ingredients, other times not. So get ready to experiment because both your climate and your earth are going to determine the quantities of each ingredient that you need. I recommend you sign up for my free 
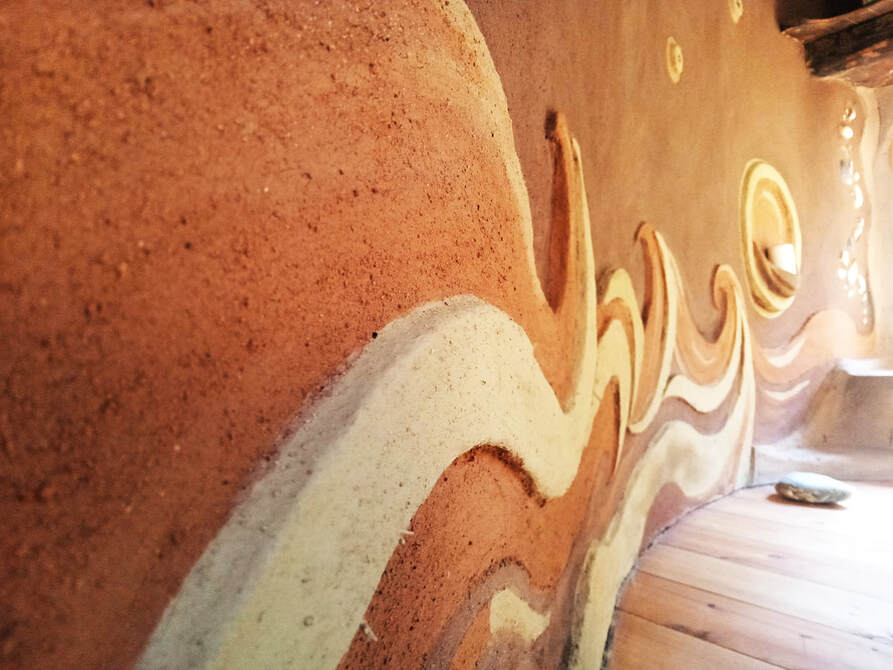
introduction to earth plaster
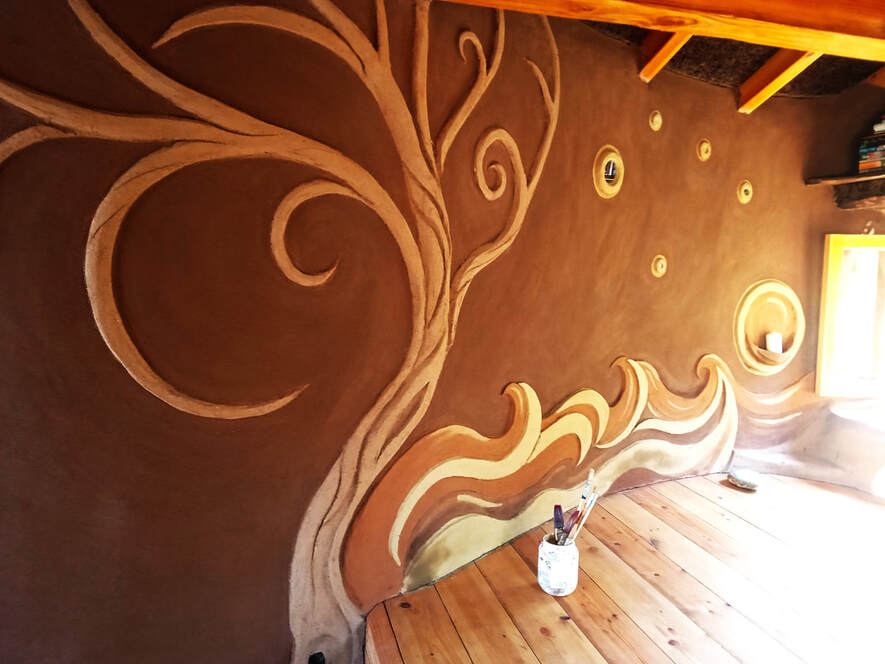
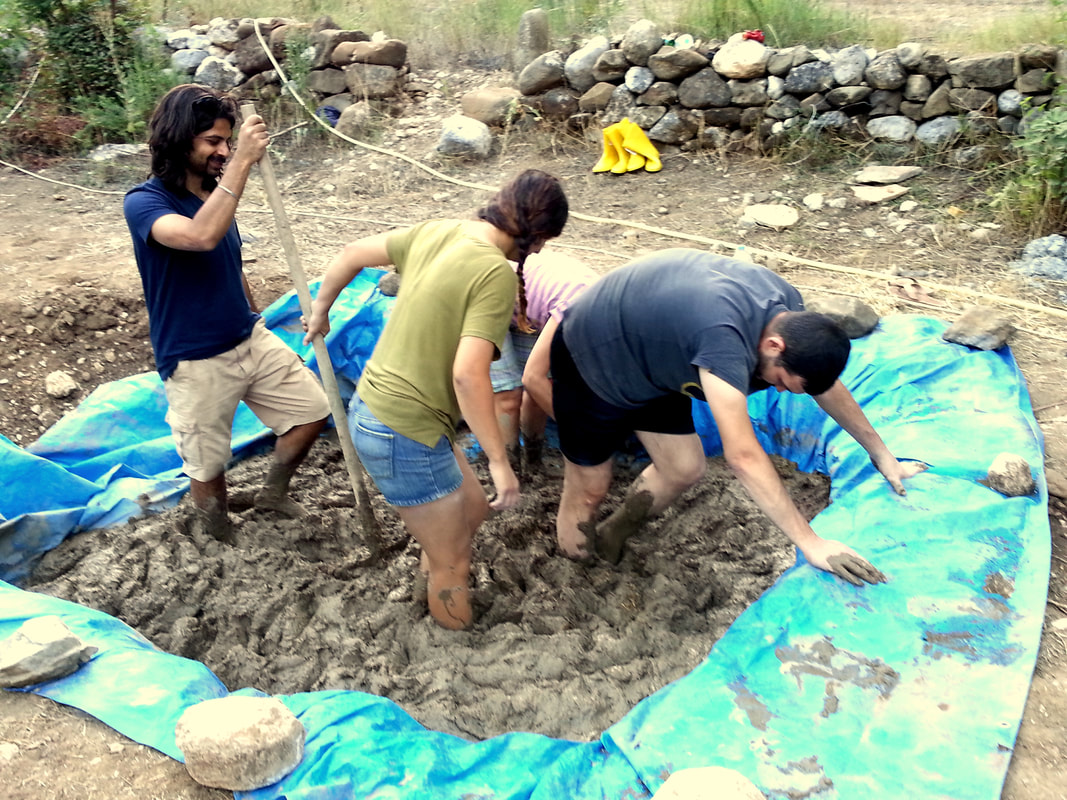
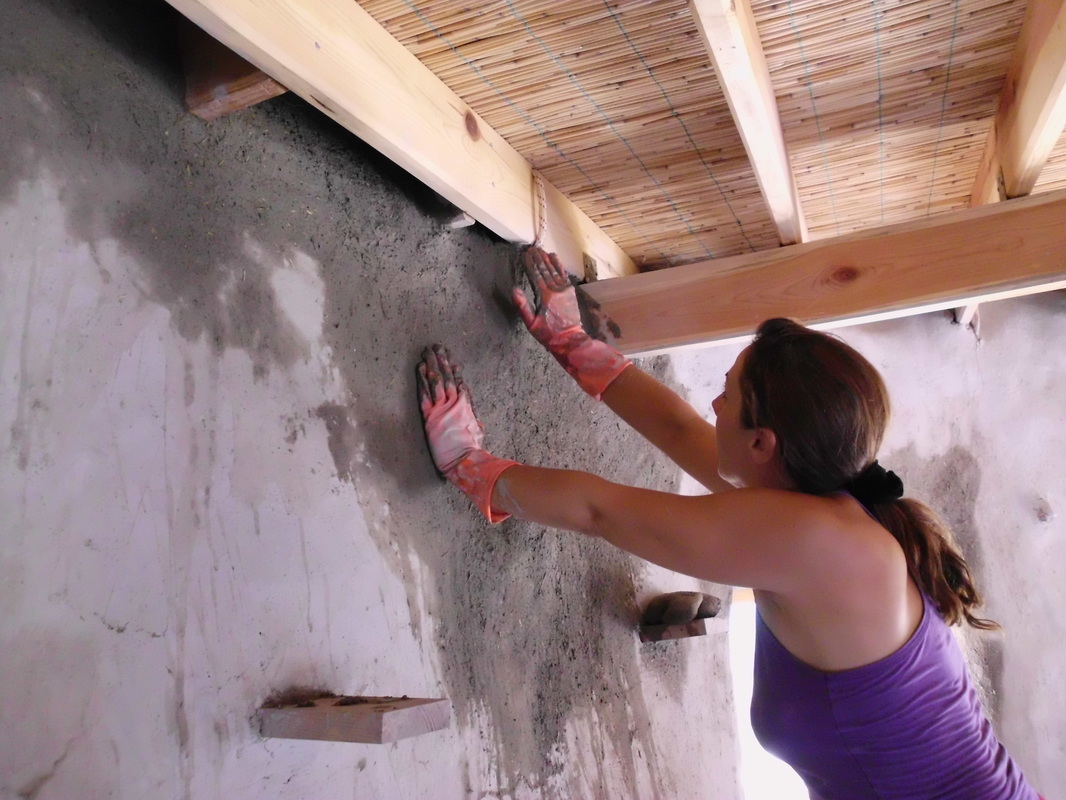
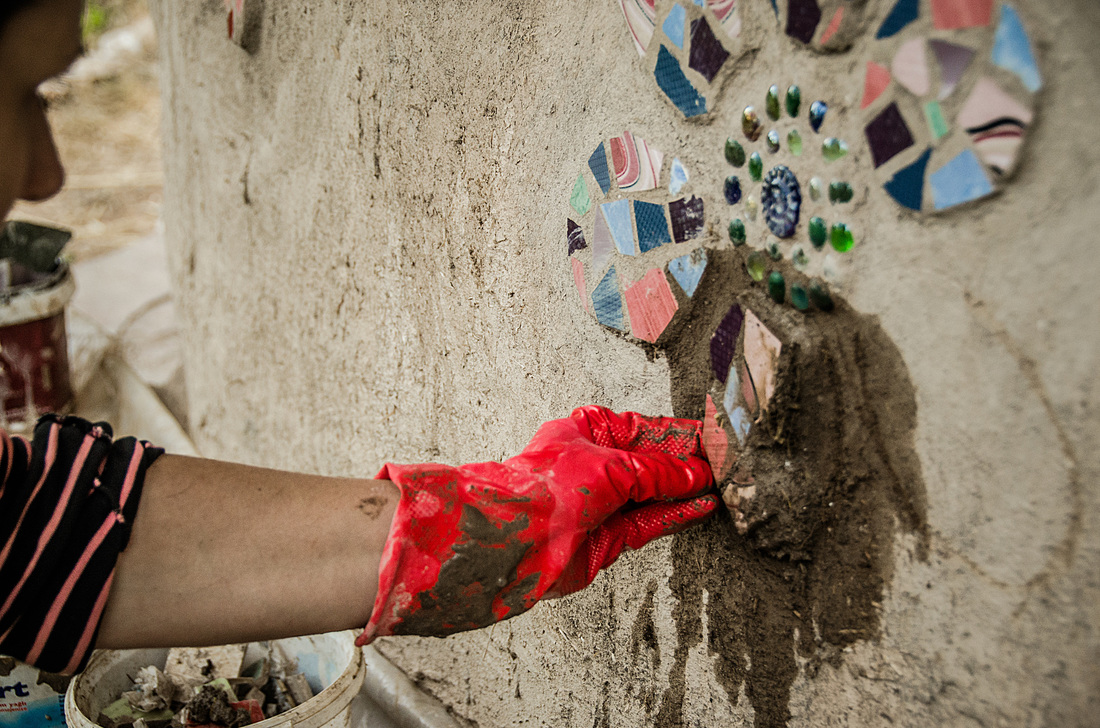
 course if you want to start on the right foot.
Picture
Some Pointers to Begin With
1. Basic earth plaster is made by mixing clay, straw and sand together until they form a nice gooey stodge. It's much more satisfying, low impact (and inexpensive) to use your own dirt in the mixture. How to do that?

2. If you are using your own dirt, you need to know how much clay is in it (again, sign up for my free course to learn more about that). Most soils are usually a mixture of clay, silt and sand. The very vague (and highly inconsistent) rule of thumb is one part clay, one part straw and one part sand. So if your earth is very clayey, you probably won’t need to add more. If your earth is sandy though, you may need to add extra clay.

Picture
The mud bath
3. Sieve your dirt before you use it. Then mix it with the straw and stomp it all together. It's much easier to do all this if your soil is dry first. Then you can sieve it, add the straw,mix it all up dry, and finally add water to bind it. After that, stomp away!

4. Let the earth and straw percolate for a few days. Then add the sand and any other ingredients you need (lime, brick dust, wheat paste, or manure). Make sure you mix it really well.
Picture
Percolated
Join my free earth plaster mini course.
5. Next apply it layer by layer.
Picture
Appying earthen plaster is therapeutic.
​When you get it right earth plaster is incredibly rewarding. You can make sculptures, beautiful arches over your windows, shelving, wattle and daub structures, cob ovens, mosaics, and more. It gives your house a wonderful warm feel, without the horrible damp coldness of concrete. After a rocky start I can now say I'm in love with the stuff.
Join my free earth plaster mini course.
Picture
When you get the hang of it, earth plaster is soooo rewarding.

Enroll in my free introductory course to learn more.

Picture
Plaster is an art and a science, but one you can learn.

Sign up for my free earth plaster introductory mini course, and start off on the right foot.


Want to learn more about earthen plaster?
Join my free earth plaster mini course.

Picture
Disclaimer: All the content in The Mud Home website is provided for informational purposes only. The author undertakes no responsibility for any person or entity who chooses to use the information on this website. It is not intended to be a standard and should not substitute for the exercise of good engineering judgment by engineers. It is the user’s obligation to make sure that he/she uses the appropriate practices and consults the appropriate experts when building. It is the user's obligation to make sure they are following health and safety guidelines. The author is not responsible for any accidents, injuries or damages to persons or property incurred while using the information presented in this website.

Some blog articles refer to the use of lime. Please note, lime is caustic and can cause burns. Read The Mud Home guide to using lime safely here.

EARTHBAG BUILDING PDF
EARTH PLASTER GUIDE
BOOKS
Newsletter
About Atulya
Privacy Policy

SUPPORT

Picture
Picture
The Mud Home takes many hours a week to run, and costs a lot to sustain. If you find this site useful or inspiring, please consider supporting it so that it can continue.
Picture

Many thanks to all those who've already become Mud Sustainers.

The Mud Home  Copyright © 2013  Atulya Kerry Bingham
  • Home
  • Building
    • Earthbag
    • Earthquakes and earthbag
    • Rubble Trench Foundations
    • Off-grid how to >
      • Off-Grid Prep Course
    • Earth Plaster
    • Lime Wash
    • Mud as Mortar
    • Wattle and Daub
    • Mud Building Blog
  • Books
    • Dirt Witch
    • Mud Ball
    • Mud Mountain The Book
    • An Earthbag House in 7 Days?
  • About
    • Contact
  • Learn Mud
    • Courses
    • Mud Building PDF Package
    • Other Projects
  • Earth Whispering
    • Join the Earth Whispering Exploration
    • MUD MOUNTAIN