Want to learn earthen plaster?
|
When you learn how to create gorgeous clay plasters from the earth around you, you begin an amazing journey into natural building.
|
Lime is a natural non toxic substance, but it is caustic, so can cause burns. It's important to wear the right safety gear when slaking, mixing or applying lime. See the full health and safety guide for lime here. So you need a hard slab on your floor but you don’t want to use Portland cement, because you’ve done your homework (or learned from experience) and know that Portland cement floor slabs are bad news in natural/ancient buildings. In this case, what you need instead is limecrete. It still baffles me how few mainstream builders use lime, especially limecrete. I really don’t get, it to be honest. Are they scared? Too stuck in their ways? What is it? Lime isn’t any harder to use than Portland cement. It takes longer to cure, which means it’s a lot easier to correct mistakes than if you use Portland. It looks a lot nicer, too. It’s cheap, uses a quarter of the fossil fuels to manufacture, and it will pull damp out of buildings like nothing else. If you’re in a wet climate, lime is the way. What’s not to like? Luckily for us, a friend of mine who shall thus be called ‘S’ has shared how she and ‘E’ made their limecrete floor for their Victorian cottage in Lincolnshire. Yes it’s to code, too. How S and E Made their Limecrete Floor Because S and E are in the UK, there are building regulations that have to be observed. But the system outlined here was pre-approved so it’s a great guide for anyone looking to make a limecrete floor system. Here we go: 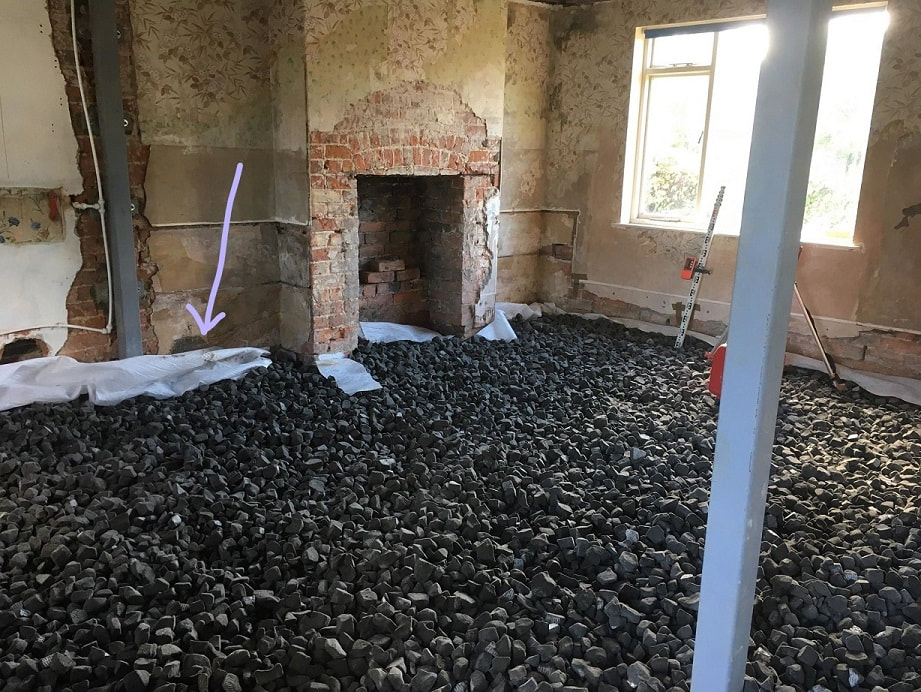 Geotextile membrane shown by the lilac arrow. 1. First, because this is an old house that someone had unwisely stuck a concrete slab in (damp issues in abundance), the existing concrete floor had to be dug out to a depth of 30cm. You can do this yourself but it’s a nasty, heavy job requiring serious machinery, so you may prefer to get a builder in. “We removed all the rubble ourselves, seemed about a million wheelbarrowsful. You have to remove absolutely every bit of it, because if you don't any sharp bits leftover will puncture the geotextile membrane,” explains S. 2. The geotextile membrane (shown above with the lilac arrow) stops the dirt travelling up into the glapor insulation. Once you have a rubble-free base to your floor, you lay the membrane. 3. Next, S and E added the Glapor insulation. Glapor is foamed recycled glass and laid to a depth of 30 cm throughout. “More long days of shovelling and wheelbarrowing,” laments S. 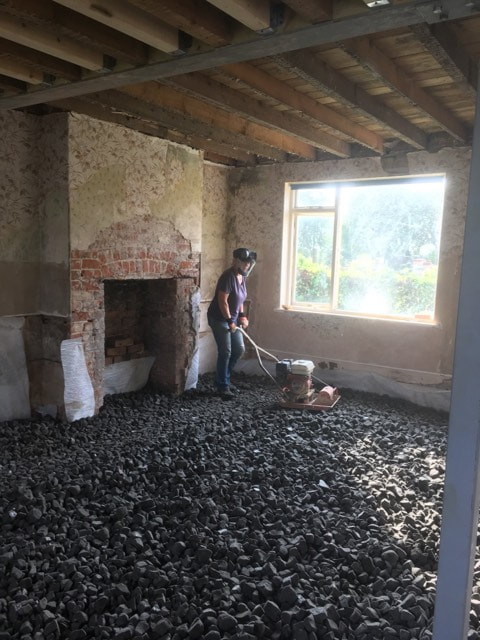 Glapor is foamed glass and used for insulating floors. 4. The next stage was to compress the glapor to 20cm. For this, you need a plate compactor. "There's just no other way to do it," S says, "It's a nasty, noisy, heavy, slow job.” (He he he, I think a picture is emerging here). 5. Not yet defeated, once the glapor was compacted S and E then put down another layer of geotextile on the top. This stops the limecrete from sinking down into the glapor. 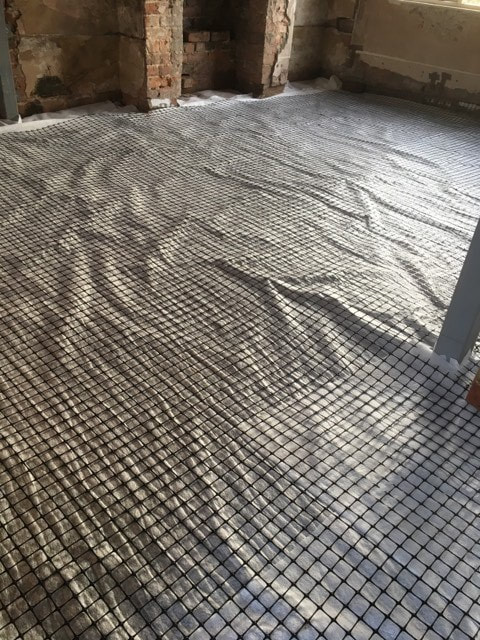 Geotextile on the top of the glapor to create a barrier for the limecrete, with geo-grid for heating on top. 5. Because they were laying underfloor heating, S and E installed a geo-grid to hold the pipes in place, before laying the pipes themselves. They then used a pressure pump to pump water through the pipes to check there were no leaks, because once the limecrete goes down, that’s it! You can no longer access the pipes. 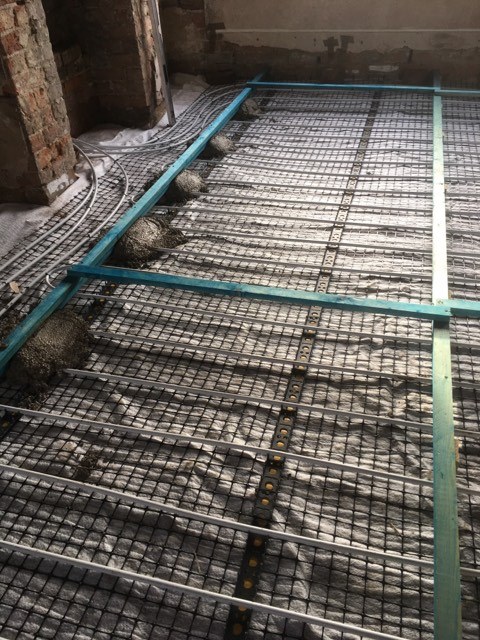 Water pipes going down for underfloor heating. 6. Once that's all done, the limecreting begins. First, you shutter off the section you're going to limecrete. “Obviously, start furthest from the door and leave the area around the door to last. Limecrete is much more forgiving than concrete and can be done section by section, provided you do the sections quickly enough that it doesn't dry out,” explains S. 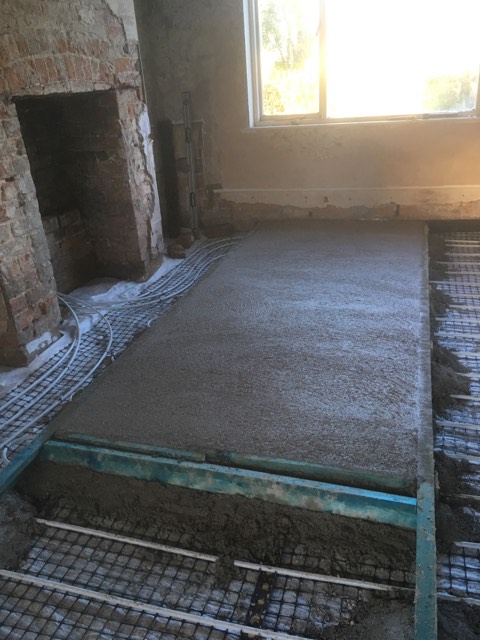 You can see the limecrete poured in sections here between the shutters. 7. The limecrete mixture was made as follows: “Our builder lent us a concrete mixer. The mix we used was 2.5 buckets of slabbing aggregate and one bucket of NHL lime, with a handful of fibres added for strength. Because of the slabbing aggregate we used, we did not need to use sharp sand, but many other systems do require sharp sand. You then add water bit by bit until the mix is the consistency of stiff porridge. Keep it mixing for 20 minutes, then empty into a strong wheelbarrow and wheel it indoors.” 8. While one person lays and tamps the limecrete in the shuttering, the other person mixes the next load. Once the entire section is laid and tamped to the level of the shuttering, you can finish it with a float or trowel, and create the type of surface you want.  9. Finally leave the limecrete overnight, before removing the shuttering on that section and setting up an adjacent section. Continue until the whole floor is limecreted. 10. Limecrete takes about three months to fully cure, but you can walk on it long before that. If you’re in a hot, dry climate, you need to damp (but not soak) the floor regularly to prevent it from drying too quickly and cracking. Once it's cured, use a stiff brush to remove all the loose dust. “You will need to do this repeatedly for quite a long time,” says S. Something tells me S is happy this floor business is over:) 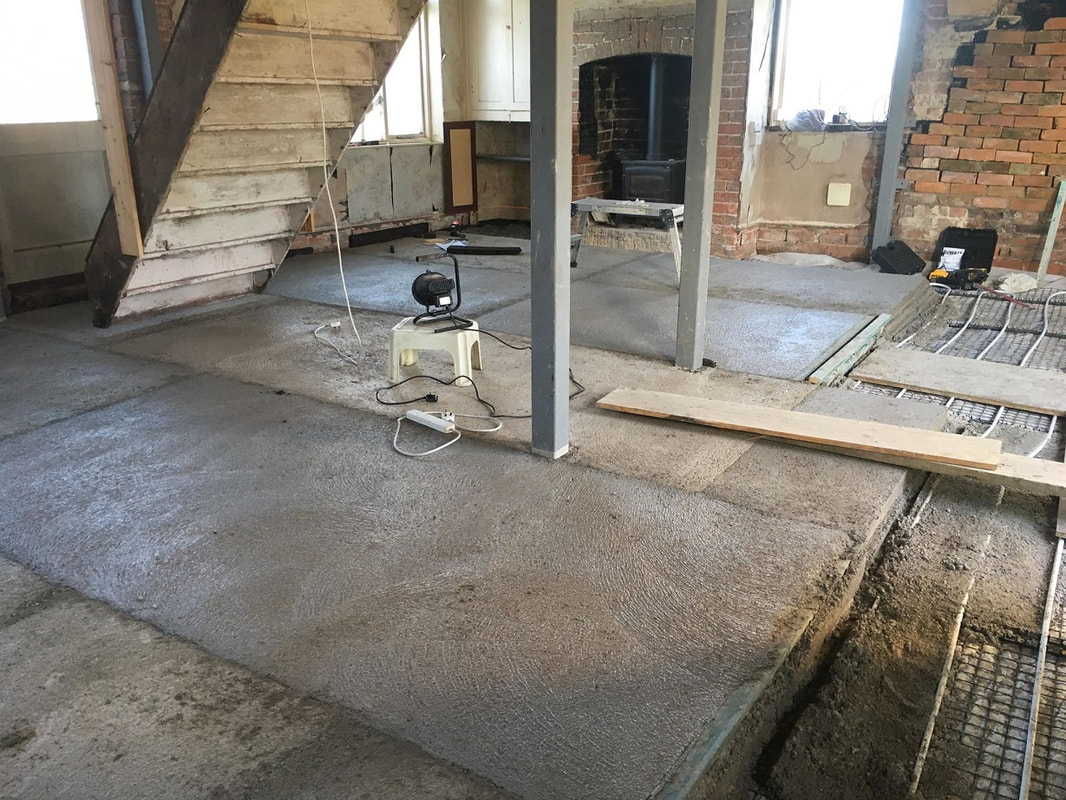 Last word on the matter from S "This was by far the biggest, heaviest, hardest, nastiest job we had to do, but once we'd done it, we felt like we could tackle anything because no job we're likely to do here now will be as physically taxing as doing that floor!" Do you enjoy The Mud Home? If you find these articles inspiring or useful please consider joining us on Patreon. Your support pays for the running of this website, my virtual help, and my sustenance. A big thank you to all The Mud Sustainers, and everyone chipping in and keeping these posts and articles coming. Another Way to Contribute If you don’t for any reason want to contribute on Patreon, you could consider buying the Mud Home Building PDFs instead. You get all the wonderful Mud Home content compiled into three comprehensive and illustrated PDFs. They are currently $25, and are updated every six months. Once you’ve bought them you always have access to the updates. 
14 Comments
Ramona K Ray
16/9/2019 11:53:44 pm
I got offered a job! Out of the blue! A friend who knows I'm bilingual asked if she could share my email address- I said yes and Srta Margarita contacted me about a job teaching Ingles to teens-in her school just down the road from mi casa!! 400 bucks a month- 4 hours a week! Mucho money here en Mexico for so little time! Yeyey 400 dolls richer a month! Wow- will start digging out of the huge hole I fell into - long story- when I'm dug out I'll be able to share again- Don't dismiss serindipity out of your equation- put out that desire for what you need coupled with gratefulness!
Atulya
31/10/2019 12:38:47 pm
True, serendipity is fundamental! And when you commit to an earth-loving road, it seems to come in bucketfuls. 15/9/2020 02:56:20 pm
The article provides us information regarding how to make the limecrete floor one way. I loved this article. They are must read for many. This article is a good one to look at. I like how you have researched and presented these exact points so clearly.
John Williamson
27/3/2022 10:00:36 am
Loving this post. I'm about to embark on my own Limecrete journey. Could you please tell me if you left the shuttering in place or removed after laying each section?
Atulya
29/8/2022 11:36:29 am
Agh, I missed this comment, but you remove the shuttering once it's firm and before moving to the next piece.
John Williamson
29/8/2022 11:49:59 am
Thank you so much for the reply. We went ahead. Mine was a pretty small area so no shuttering required in the end. Veru happy with the result.
Emma B
1/4/2022 11:35:13 am
Excellent step by step article for those considering laying their own limecrete floor. Or considering if they dig out the cement ones already down. Eeek
Daphne
21/6/2022 04:00:17 am
Thank you for this post - good to have another limecrete resource online (there are not many!).
Atulya
21/6/2022 01:34:22 pm
Hello Daphne. No the PDFs don't have any extra articles in, they are a downloadable collated package of what's already online with clickable headings to make it easier to access. I do have a lime course which has more information. You're welcome to browse the curriculum https://the-mud-home-courses.teachable.com/p/the-all-about-lime-course
Daphne
21/6/2022 01:40:52 pm
Thanks I found your lime course after i sent this comment and going to purchase it!
ells
31/8/2022 07:48:28 pm
Just wondering did you use an ordinary cement mixer,? I cannot find a pan mixer to rent, and wondering if cement mixer would work. Heard it 'balled' the limecrete??
Ells
31/8/2022 07:57:46 pm
Thank you btw in advance 😊 ells 17/9/2022 02:13:55 pm
Great ideas! This will certainly improve anyone's home floors. Just about to lay yhe screed, Glapor al in compacted and to a reasonable level. How long would you say I could leave it before continuing. I could probably get half done in a weekend and the rest the following weekend. I can call in on site and keep the joining edge wet till continuing. What’s your thoughts? Leave a Reply. |
Many thanks to the Mud Sustainers supporting this site!

Do you find The Mud Home valuable? Please consider supporting the blog on Patreon. For as little as $2 a month (not even a coffee where I'm from), you can join the club.
BENEFITS FOR PATRONS INCLUDE:
Email priority, private Facebook group, review copies of my books, sneak previews of courses and books, Q and As, priority for courses and more. AuthorAtulya K Bingham 
"Beautifully written and inspiring." The Owner Builder Magazine
FREE!
If you want the step by step guide of how I built my house, sign up for the PDF.
WHY NOT? IT'S FREE! Categories
All

All the Mud Home How-to posts have been compiled into a PDF package with 75 articles and over 200 photos. You can still buy it now, and enjoy lifetime access to all the updates.

“Entranced! Be inspired by one who’s lived and breathed dirt.”
Kim Fraser, Get Rugged |

|

|
The Mud Home takes many hours a week to run, and costs a lot to sustain. If you find this site useful or inspiring, please consider supporting it so that it can continue.

Many thanks to all those who've already become Mud Sustainers.
|
 RSS Feed