Want to learn earthen plaster?
|
When you learn how to create gorgeous clay plasters from the earth around you, you begin an amazing journey into natural building.
|
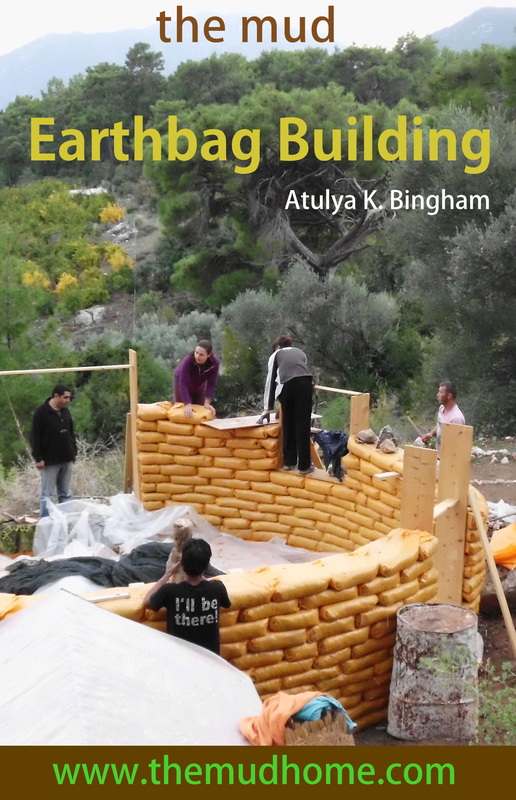
Earthbag building is probably one of the least technically taxing construction techniques you can choose. You can get away with having no experience whatsoever and still build yourself a strong, sound home. That said, I have seen a few examples of things going wrong, and it’s always the same mistake, so I thought I’d shine a spotlight on it. Everyone worries about the wrong thing, and I was exactly the same. Most questions come to me concerning foundations, climatic impact on earthbags, and bag fillings. This is probably because folk are at the outset of their build and still planning. Once the construction begins, the questions tend to evaporate in the excitement. 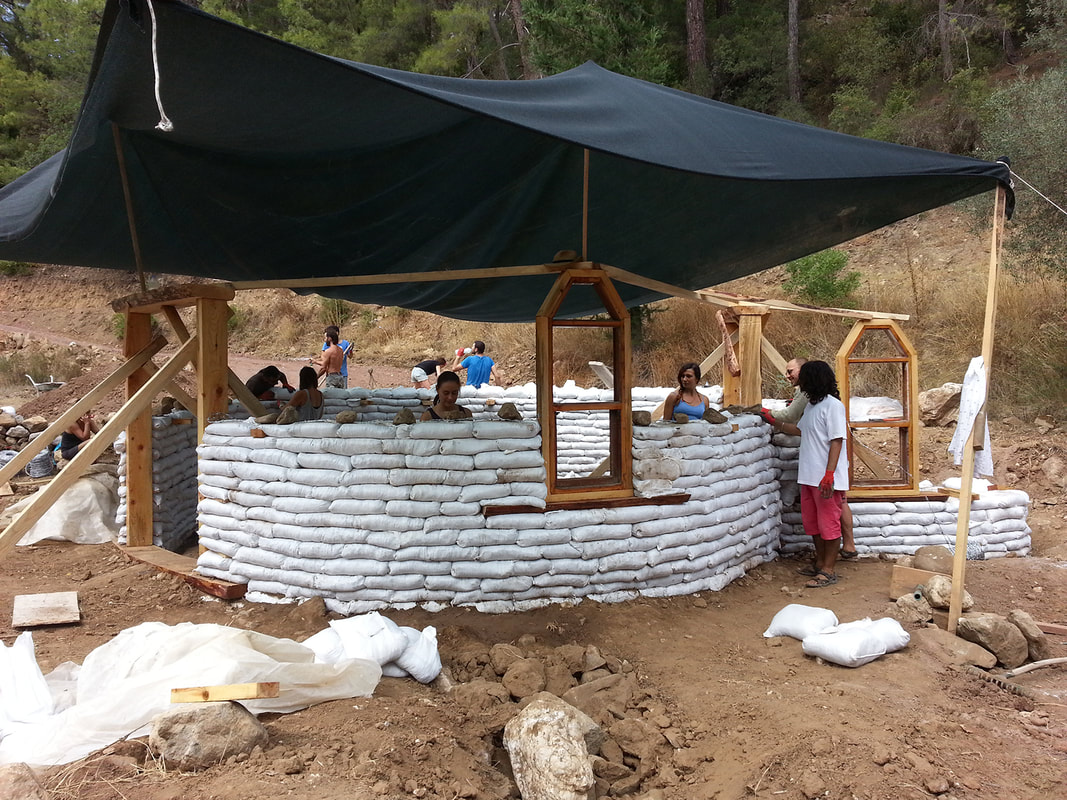 Once the building begins, the questions evaporate. Things not to lose sleep over: The bag filling is not nearly as crucial as you think it is. As long as you’re using dirt, and that dirt is basically sticking together when wet, you’re going to be fine, (see my article on bag fillings). I did recently spot some birdbrained article by someone who had clearly never laid a finger on an earthbag, claiming you put straw in the bags. Obviously that would be a bad idea. Earthbags are for clayey earth. The foundations Now I’m not saying you don’t need to think about foundations. You do. But we’re all somewhat brainwashed by mainstream building techniques, and convinced the foundations are the linchpin preventing the house from falling down. We’re also certain that that there has to be a concrete slab somewhere, because that’s strong, right? In fact, a whole bunch of things contribute to the structural integrity of a house. With earthbag building, the foundation is as important for drainage as it is for structural strength. Forget the concrete slab. Forget concrete full stop. It really isn’t what you want or need. Make yourself a nice simple rubble trench with a couple of earthbag rows below grade, and you’ll be fine. It’s simple, effective, and hard to screw up. 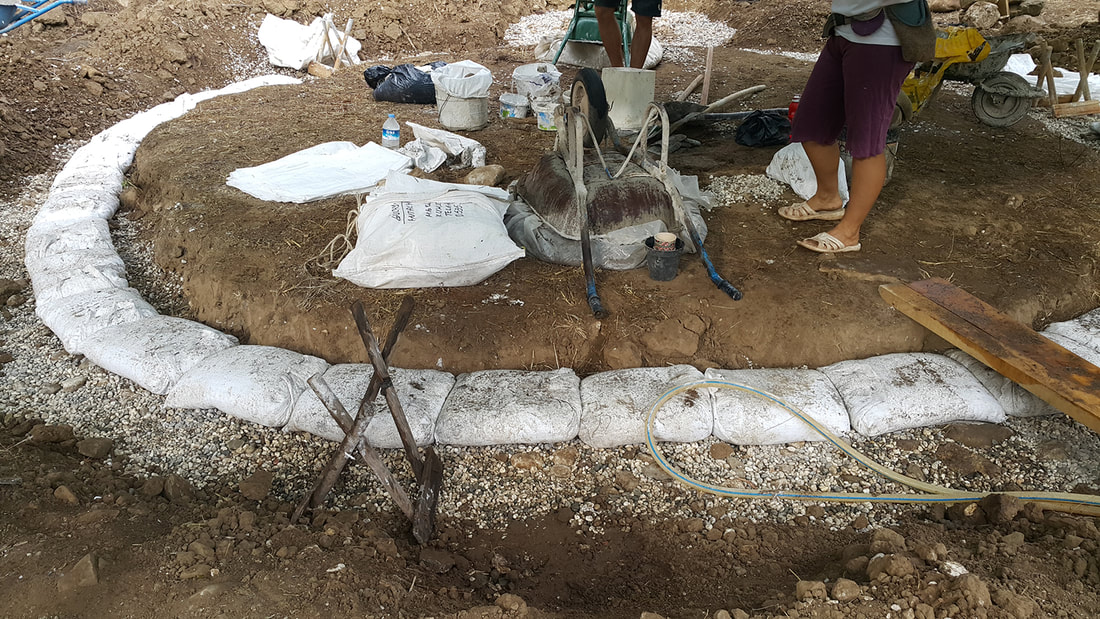 Rubble trench foundation. The most common mistake is for a wall to collapse. The most common earthbag issue by far is for a wall to topple. This notably only happens with square/rectangular structures or very large round structures (more than 10m diameter), or retaining walls. So if you’re new to the bagging game, you might want to consider a smaller round house first. If you’re adamant you want straight walls, then you’ve got to pay good attention to a few things: 1. You need buttresses. And the buttresses must lock into the wall and be attached to the barbed wire of each layer. So you can’t just say, “Oops maybe I need a buttress here,” and add one at the end. It has to be incorporated into the build. This equally true for retaining walls. The higher the wall, the more buttresses you need. A rule of thumb is a maximum of 10 feet/3 metres between buttresses. 2.Your vertical straightness is crucial. With a small round house you can get away with an awful lot. With a square/rectangle, those walls need to be vertical. 3. You need a decent bond beam* to lock the top of the structure together, and on a square structure, that would mean long, straight planks of wood nailed into the top layer of bags. 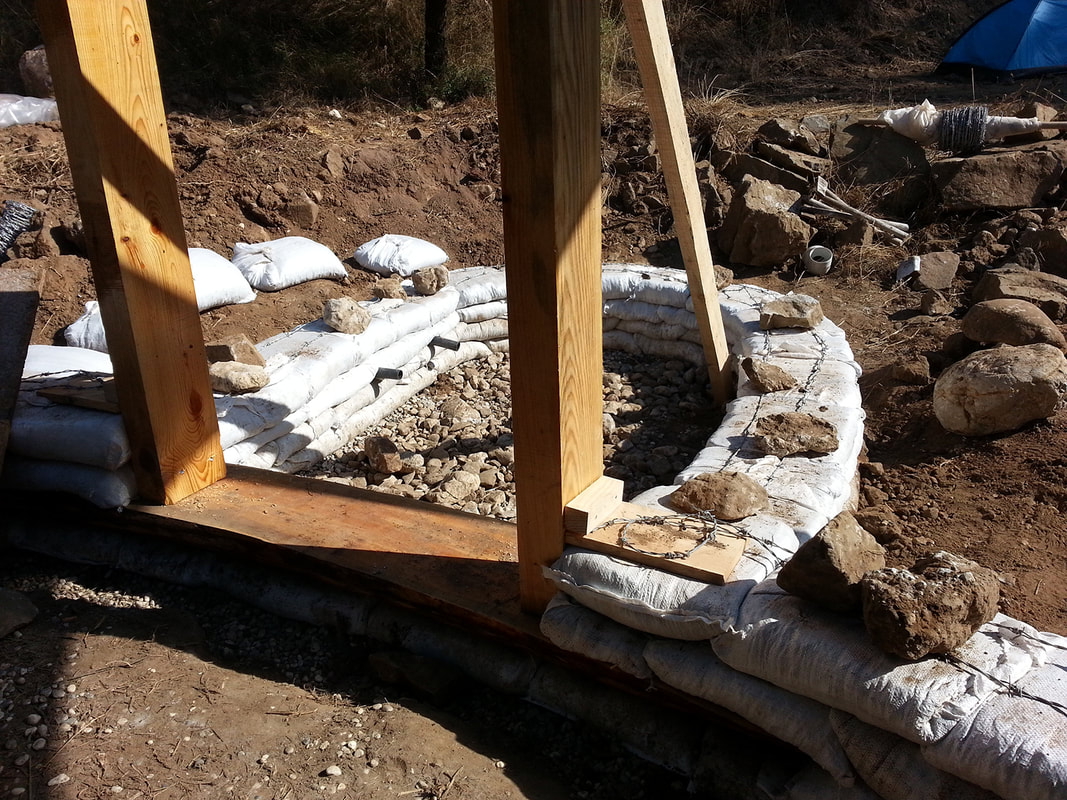 Everything must be interlocked using the barbed wire. The logic behind earthbag strength Every building technique has its own logic, and its own way of supporting itself. With earthbags, the structural strength of the building is created by the ‘tying’ together of everything within the structure using barbed wire. Everything – every bag, every window frame, every door frame, every arch and buttress – must be attached to the rings of barbed wire so that the entire structure is interlocked. This is what really gives it the tensile strength when under pressure of impact or earthquakes, and what stops the walls from toppling over. If you want to assess whether your walls are liable to collapse, climb on the top of them or give them a shove. If there’s any swaying, you’re in trouble. Finally, at the end of the build, make sure you have two layers of earthbags going over the top of everything (lintels, arches etc.) Those final two layers create enough pressure and tension to hold the structure together. In most cases you will also add a bond beam* here too. 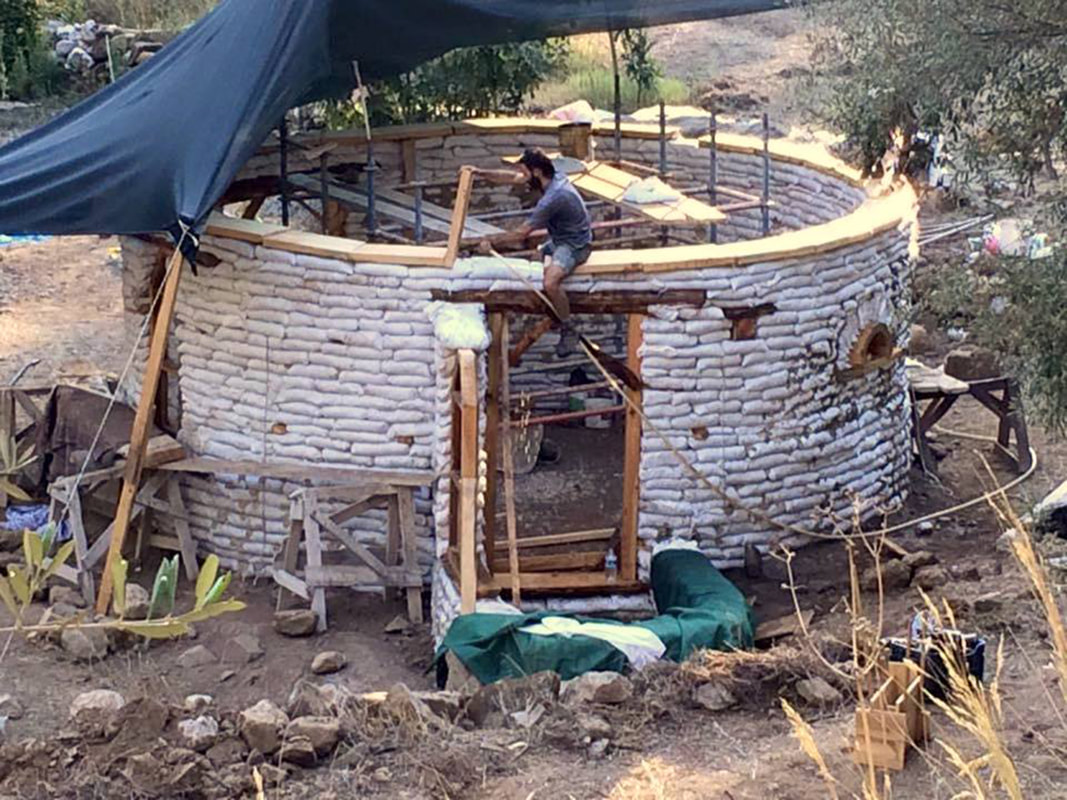 Here you can see two layers of bags over the lintels, plus a nice bond beam. That house ain't going nowhere. I know some people are using mesh bags, and I have to be honest, I don’t see how the structural integrity of the building is maintained, especially in seismic areas where the house sways. If someone has actual hard-won experience (rather than hearsay or armchair opinion) of using the mesh bags, please add your findings in the comments below. *A bond beam is a horizontal reinforcement that runs along the top (or sometimes the middle) of a wall. It holds the wall together and stops it breaking open. In modern mainstream construction, concrete and rebar are used. In traditional building it has usually been thick wooden planks or beams. Don’t assume concrete is stronger. It is brittle, and in the case of an earthquake it can crack. The rebar is the only thing giving concrete any strength. In my opinion, for an earthbag structure, wood is a better option. It has more give, and can move with the house in the case of a quake.  Special Christmas offer until December 24th. If you want to know more about the kinds of mistake you can make while building an earthbag house, you may be interested in my most popular book, Mud Ball. This is the story of how I built my own earthbag house, and the various agonies I and the victims I managed to lure into helping me, endured in the process. The ebook is on offer this week at $3.99 on all ebook retailers in all locations (including Kindle, Nook and ibook) so if you’d like to catch it at this lower price, now is your chance. It will go back up to $5.99 on 24th December 2017. “Despite having very little money, almost no building experience, and endless naysayers who told her she would fail, Atulya K. Bingham completed her lovely earthbag home . . .Her personal, inspirational story shows how anyone can build their own sustainable home with earthbags." Dr. Owen Geiger, author of Earthbag Building Guide and the Natural Building Blog. Do you enjoy The Mud Home?
If you find these articles inspiring or useful please consider joining us on Patreon. Your support pays for the running of this website, my virtual help, and my sustenance. A big thank you to all The Mud Sustainers, and everyone chipping in and keeping these posts and articles coming.
18 Comments
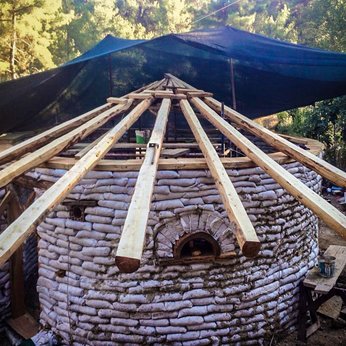 Feryal and Baykal's earthbag house. Earthbag workshop 2016 Turkey, Feryal and Baykal's earthbag house. Earthbag workshop 2016 Turkey, How much does it cost to build an earthbag house? It’s the question I love to hate. But I’m asked it a lot, and I understand. People want a ballpark figure before they decide if such a house is for them. The truth is, you could spend a thousand dollars on an earthbag house, or a hundred thousand. It depends on many many things. So before you zip over to that contact form to ask me, read on. (A cost breakdown of our last earthbag build in Turkey 2016, is below) Consider: 1. What type of earthbag house are you building? A ten-bedroom castle, a school, a shed? 2. Are you paying for manual labour? Or do you have volunteers? 3. Which country do you live in? Are materials cheap there? Are skilled workers such as carpenters expensive in your country? 4. Are you a perfectionist? Or are you fine with a few lumps and bumps? 5. What kind of roof are you making? The roof is the most expensive part of the build. 6. Are you building a round house (less expensive and stronger) or a square structure? Post and beam? (The more wood in your build, the more it's probably going to cost). 7. Are you trying to build to code, or are you winging it? All these factors are going to impact greatly on how much your house will cost. So, the short answer to “How much does it cost to build an earthbag house?” is “I’ve no idea.” How can you estimate the cost? I decided to publish a breakdown of the cost of the 5.5 m diameter round house plus bathroom, we built in our earthbag building workshop in Turkey last year. (Thanks to Baykal for keeping a record of the figures). But there are a number of things to take into account. 1. This was Turkey. As you will notice, some things are very inexpensive, others not so much. If you are in the UK the labour is going to look incredibly cheap. If you are in India, it's going to look expensive. 2. We used some of the earth from the site and some with a higher clay content was shipped in (roughly half and half). 3. We used more lime than you are ever likely to due to odd climatic conditions in our region. Thankfully lime is as cheap as chips in Turkey. In fact, now I think about it, per kilogram it's cheaper than chips! 4. At the time of writing, most of the exterior and interior plaster work had been done, but the floor hadn’t been laid and the bathroom was only half completed. The roof will receive a thick layer of clay on it too. So extra costs will certainly occur over time. 5. With the exception of the roof, the house was built almost entirely with volunteers and course participants. Cost of the earthbag round house without roof.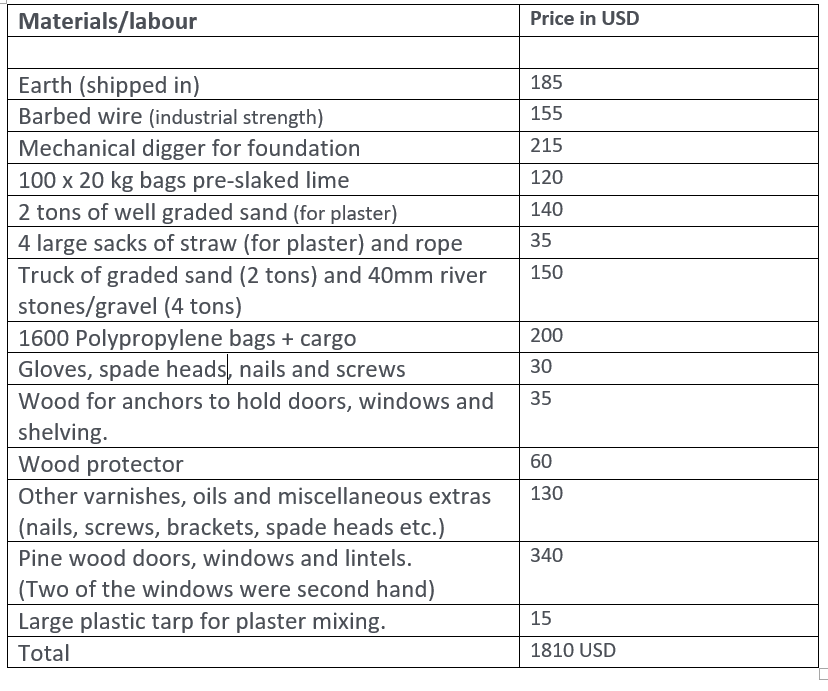 Figures in US dollars based on the Turkish lira exchange rate at the time of writing. 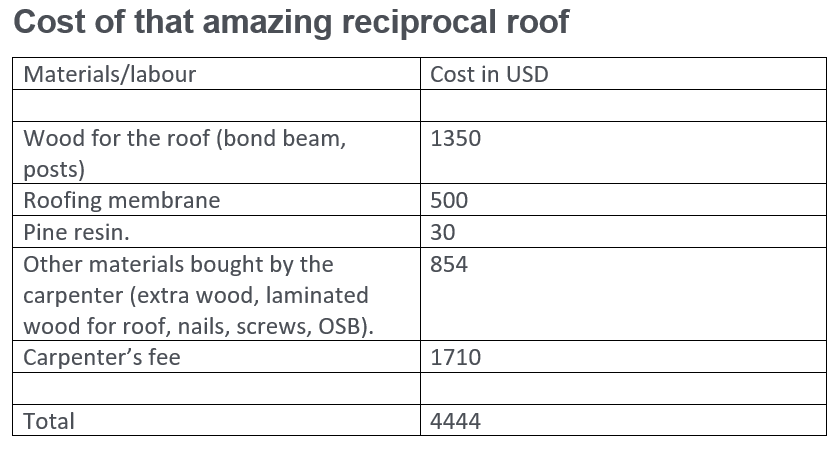 Total house price = approx $ 6250 USD Note: We estimated that if we had made a simple living roof as on my own mud home without employing a carpenter, such a roof would cost about 1000-1500 USD. In which case the total house price would be nearer to $3000 USD. Be Prepared! One thing I’ve learned is this: No matter how much you calculate and research, be prepared for your budget to be blown. For some mysterious reason (quantum physics? The illuminati?) all construction seems to cost twice as much as you estimate. Things take longer than expected. Other things go wrong. It’s just like that. So allow some nice wide margins in your budget. Or end up like me, and have to step back into the daily grind for six months to earn the money to finish. 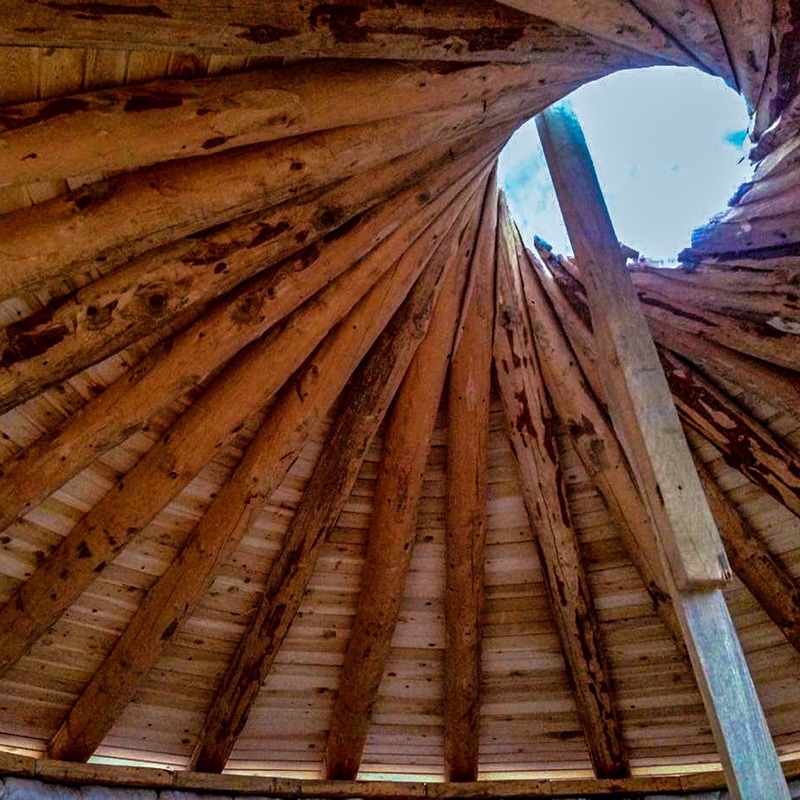 Most of Feryal and Baykal's money went on this amazing roof. 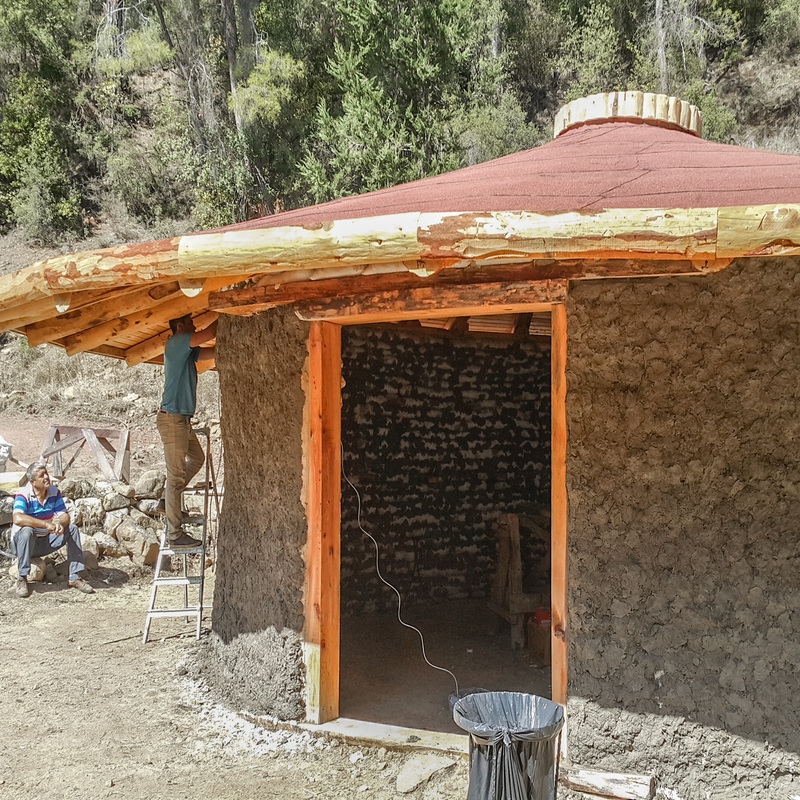 The house with first layer of plaster on. Many thanks to Baykal for keeping track of the figures for us. Do you enjoy The Mud Home?
If you find these articles inspiring or useful please consider joining us on Patreon. Your support pays for the running of this website, my virtual help, and my sustenance. A big thank you to all The Mud Sustainers, and everyone chipping in and keeping these posts and articles coming. |
Many thanks to the Mud Sustainers supporting this site!

Do you find The Mud Home valuable? Please consider supporting the blog on Patreon. For as little as $2 a month (not even a coffee where I'm from), you can join the club.
BENEFITS FOR PATRONS INCLUDE:
Email priority, private Facebook group, review copies of my books, sneak previews of courses and books, Q and As, priority for courses and more. AuthorAtulya K Bingham 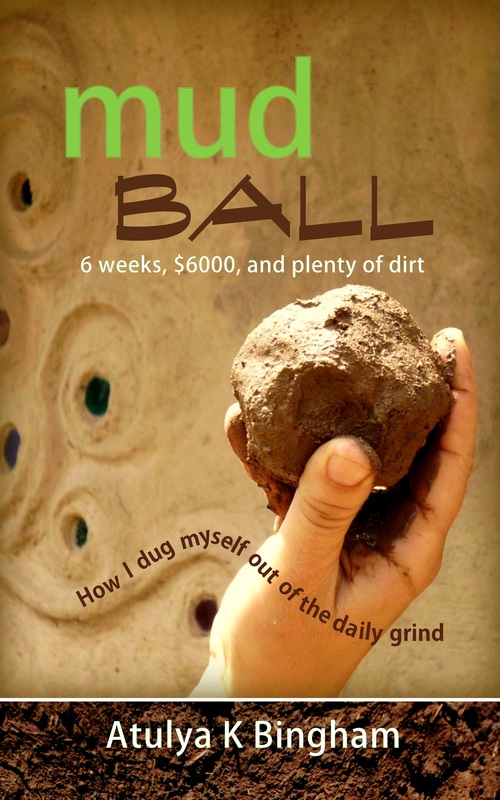
"Beautifully written and inspiring." The Owner Builder Magazine
FREE!
If you want the step by step guide of how I built my house, sign up for the PDF.
WHY NOT? IT'S FREE! Categories
All
All the Mud Home How-to posts have been compiled into a PDF package with 75 articles and over 200 photos. You can still buy it now, and enjoy lifetime access to all the updates.
“Entranced! Be inspired by one who’s lived and breathed dirt.”
Kim Fraser, Get Rugged |

|
|
The Mud Home takes many hours a week to run, and costs a lot to sustain. If you find this site useful or inspiring, please consider supporting it so that it can continue.

Many thanks to all those who've already become Mud Sustainers.
|
 RSS Feed