Want to learn earthen plaster?
|
When you learn how to create gorgeous clay plasters from the earth around you, you begin an amazing journey into natural building.
|
Do you know your cob from your adobe? And what about superadobe? Are you daubing instead of wattling? Or could you even be ramming? Hmm. Mud building has developed over thousands of years, and there are a variety of wonderful techniques. Because most mud building uses the same essential materials (a mixture of clay, straw and sand) the names are sometimes used a little loosely, which can lead to right muddy mess of how-to: cob, adobe, superadobe, wattle and daub, and rammed earth. What's the difference? Quite a lot. Each mud building technique has evolved in specific regions of the planet, and each has its pros and cons. Before you start a mud build, it pays to know them so that you can choose the mud house that best suits your needs and wants. 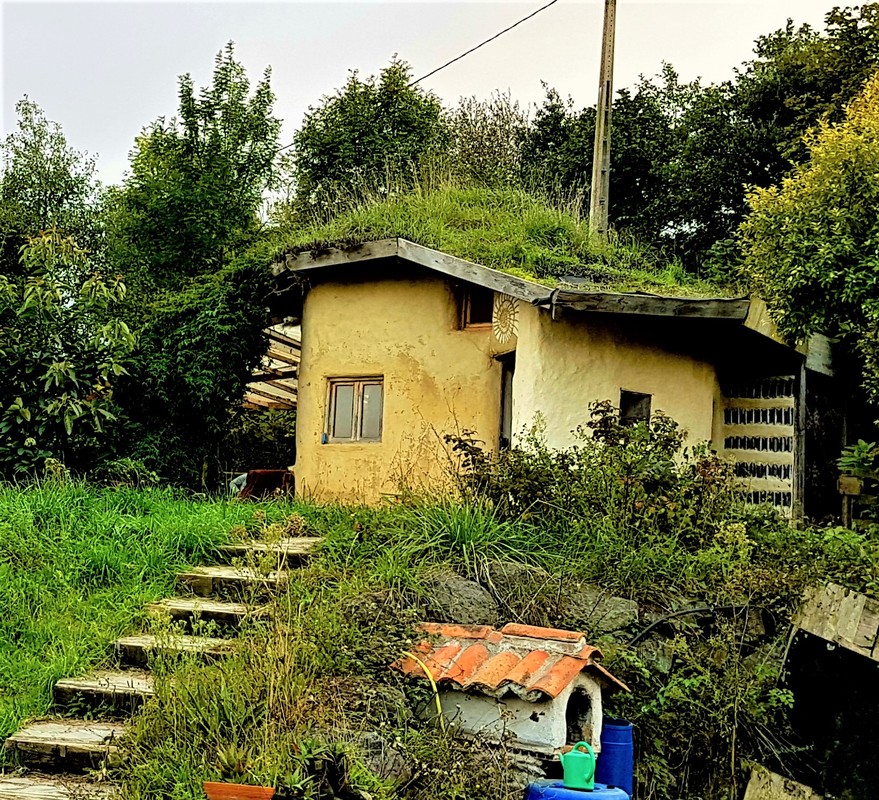 Cob cabin in Abrazo House in Spain Cob Cob is probably the most misused word in natural building. People throw it around pretty much any time they chuck a bit of mud. I’m not a massive jargon junkie, nor particularly nit-picking, and quite honestly, who cares which word you use if you’re just lobbing mud with a group of pals. But if you’re teaching technique, cob is a very specific mud building method which works for some climates and temperaments, and not for others. Cob is an Old English word, and today refers to a technique particularly prevalent in the south west of England, East Anglia, parts of Ireland and Wales, Brittany, and a lot of rural Africa. Because there is no post-and-beam structure, in a fair few regions in the world it can slip through the grey areas in building regulations (in many areas, a structure isn’t recognised as a proper building unless there is concrete involved). How is it done? Cob houses are constructed layer by layer. Basically you are mixing up clay, straw and sand, and throwing large patties of it to create a wall. One layer has to dry before the next is laid, so cob building takes time. There is no frame, and no other structural material used. Because of this you really can sculpt the house in the shape you want. Things to note: Cob is not the best technique for a flood plain (as even Ivanto Evans states in his marvellous book, The Hand Sculpted House, a recommended read for anyone considering cob), because a cob wall can disintegrate suddenly when sitting in water. This is why, as with all mud builds, you need a decent rubble trench foundation (not concrete, definitely not concrete), and a nice high stem wall made of stone. 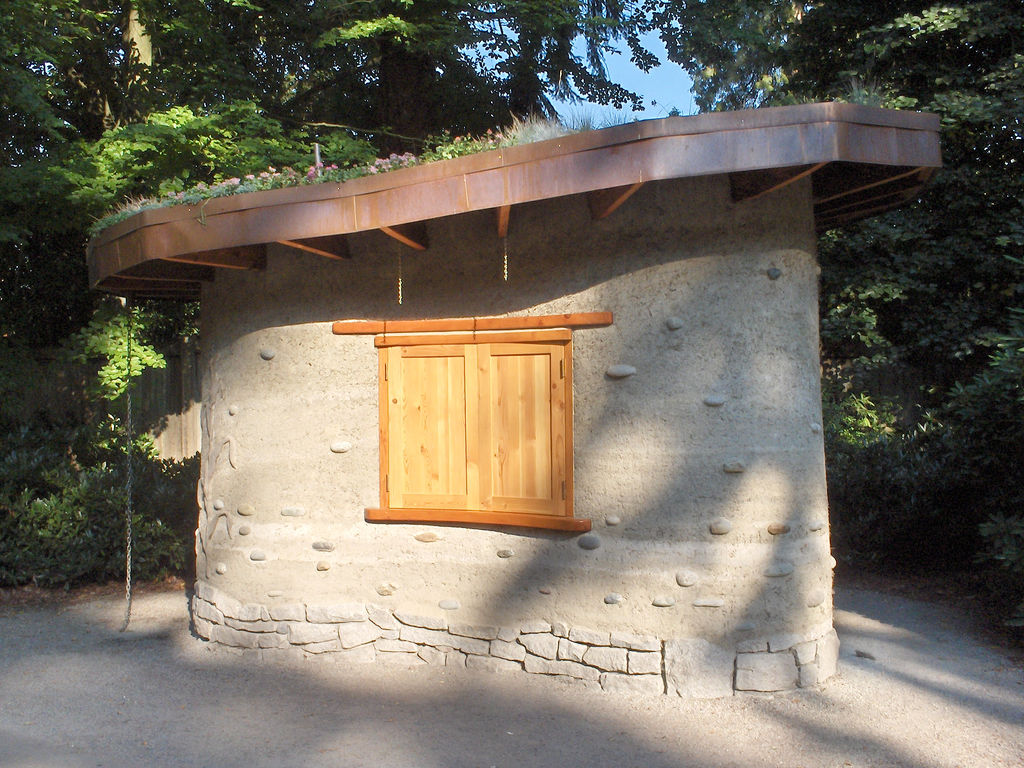 A stem wall made of stone protects the cob walls. Photo by arifm (a cob house!) [CC BY 2.0 (https://creativecommons.org/licenses/by/2.0)], via Wikimedia Commons Adobe Adobe is probably the most widespread traditional building technique in the world, and can be found in abundance in Africa, the Middle East, South and Central America, and Asia. How is it done? Adobe utilises the same clay, straw and sand mixture as cob, only this time the ‘mud mix’ is poured into molds and left to dry in the sun. Thus bricks are formed. These are then stacked to build the adobe home, with an earth plaster used as mortar. For a great and detailed info-article on adobe building and how to make adobe bricks, see this post in The Abundant Edge. Things to note: This technique works especially well in hot, dry climates. Again, such houses are somewhat more prone to flooding issues and need decent rubble trench foundations and good stem walls in wetter climates. 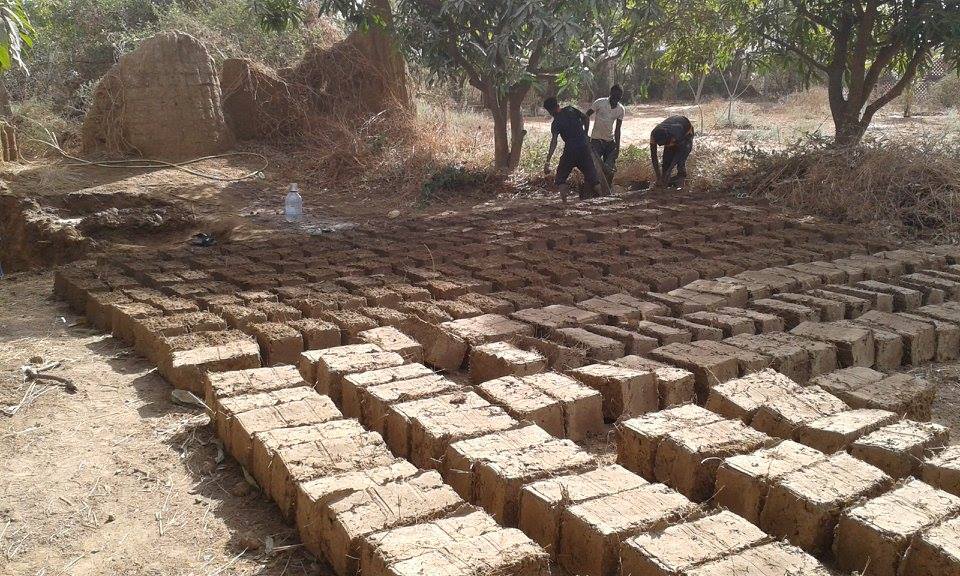 Adobe bricks, photo by Oliver Goshey at The Abundant Edge Superadobe Another confusing name. Superadobe is actually earthbag building. The reason it’s also called superadobe is because rather than having to preform and dry adobe bricks in the sun before you start building, you stick damp clayey earth into sacks, and then let it cure on the wall. Superadobe also doesn’t use the traditional clay, straw and sand mixture. It’s simply clay and earth for the main structure. This potentially makes it faster because you don’t have to stomp all that mixture together before you build. How is it done? Wet bags of earth are filled and laid head to toe, then tamped to squash the earth into solid bricks. Each layer is held together by rows of barbed wire. See the whole story here. Things to note: While earthbag doesn’t boast the romantic elegance of a traditional technique, Earthbag does perform amazingly well in extreme conditions. It is almost invincible in terms of strength, and has proved nearly impossible to fell on the shake table. It’s also the most secure mud building technique if you live in a flood zone, because the bags keep the dirt in place even if the wall gets wet. The bad news regarding earthbag is however, that it’s fairly labour-intensive, so you want a bit of muscle on your team if you choose this method. 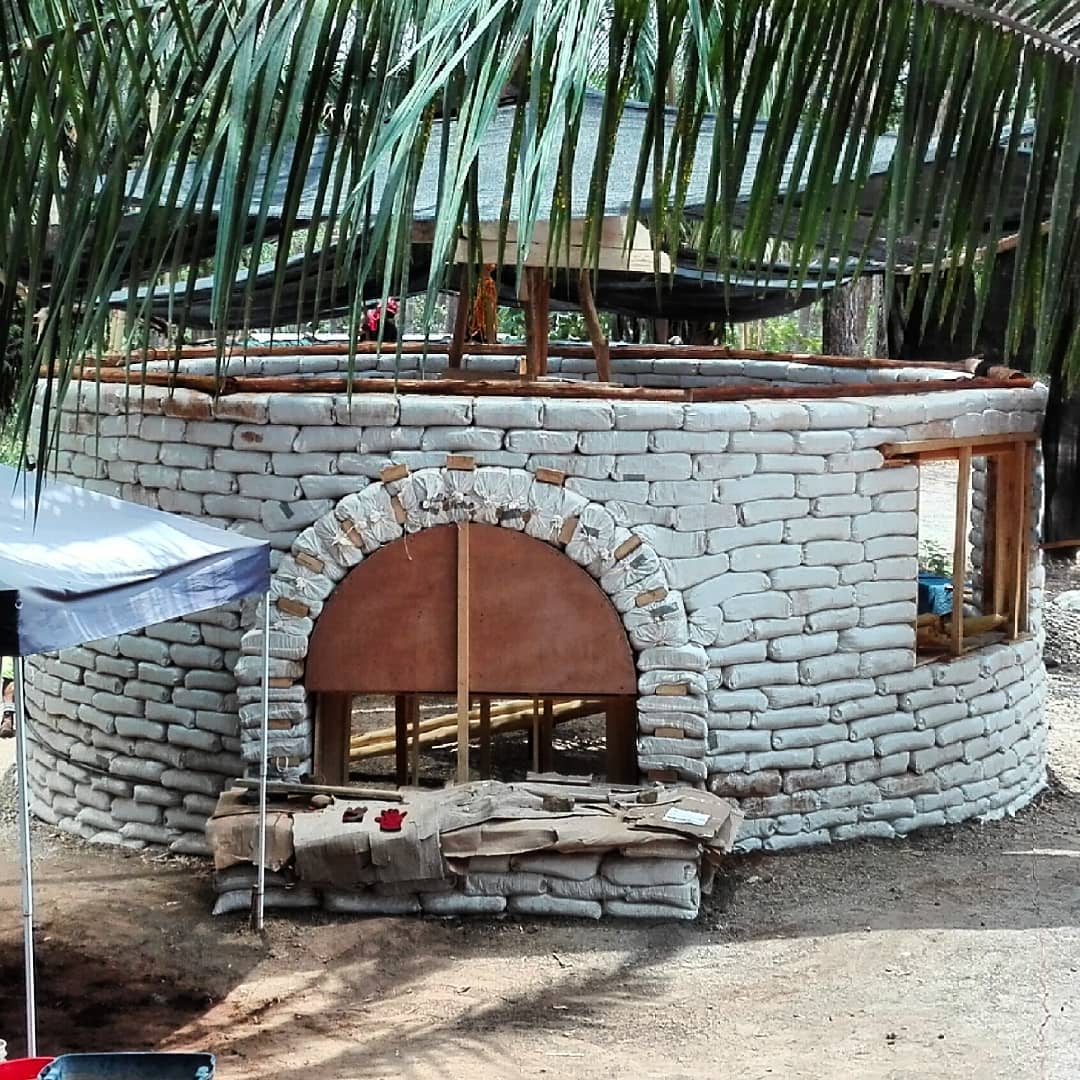 Sam, Murat and Leora’s superadobe complex in Costa Rica Wattle and Daub Another very ancient technique found in many corners of the world; wattle and daub doesn’t just use the mud mix. The wattle is a lath frame, and the daub is some variation on earth plaster. How is it done? Usually wattle and daub uses a post-and-beam structure. A lath is made from willow or similar strong, bendable wood, and then it’s plastered over using that same mud mixture again. The mixture is layered to create very thick walls (though you have to let each layer dry thoroughly before adding the next). Things to note: Because you use a post and beam structure it may be easier to get a permit for wattle and daub in the right area, than say earthbag. The frame means you can create very straight walls (if you want that), and it gives the mud a little more structure in the event of a flood or such like. 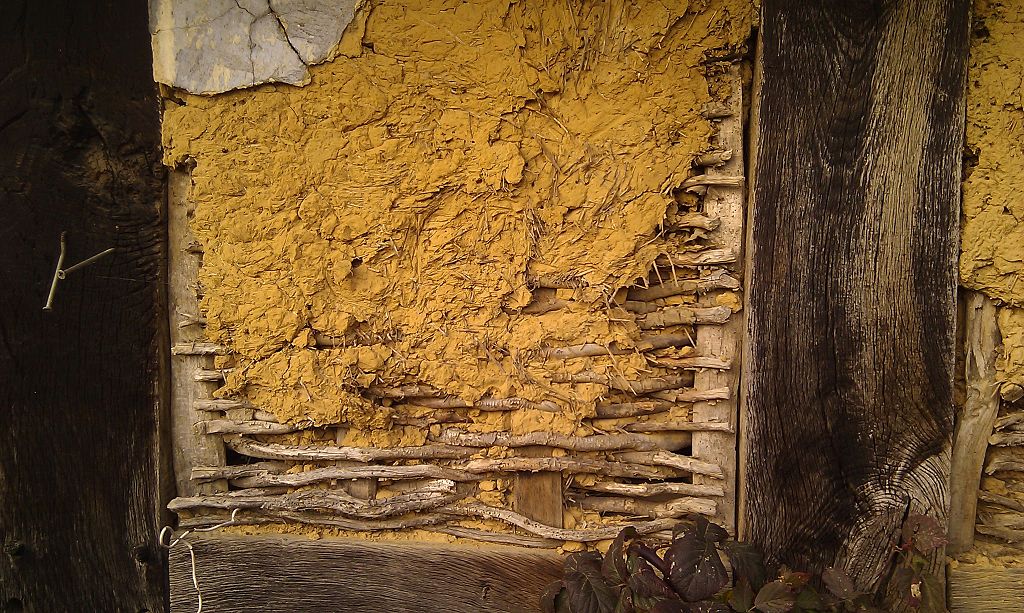 How to wattle and daub Rammed Earth Another golden oldie of mud building. A similar mud mixture: Usually just clayey soil and sand, though I have seen other things such as straw and sawdust added too. You see a lot of rammed earth in the Middle East and North Africa, and modern rammers create some amazing results with it. The Eden project in the UK, Stanford University meditation centre, and the gorgeous Senegalese Cultural Centre are just a few examples. How is it done? Instead of a lath, or bricks, or just throwing mud, this time the clay mixture is stuffed into moulds and squashed down. Again you wait until each layer dries before adding the next, hence why it’s been so utilised over the centuries in the Middle East where the climate is dry for months at a time. See this GreenSpec article for more information. Things to note: Rammed earth is extremely long lasting. It can also be used to create very sleek, modern finishes with an interesting marbled effect created by the layers of compressed earth. 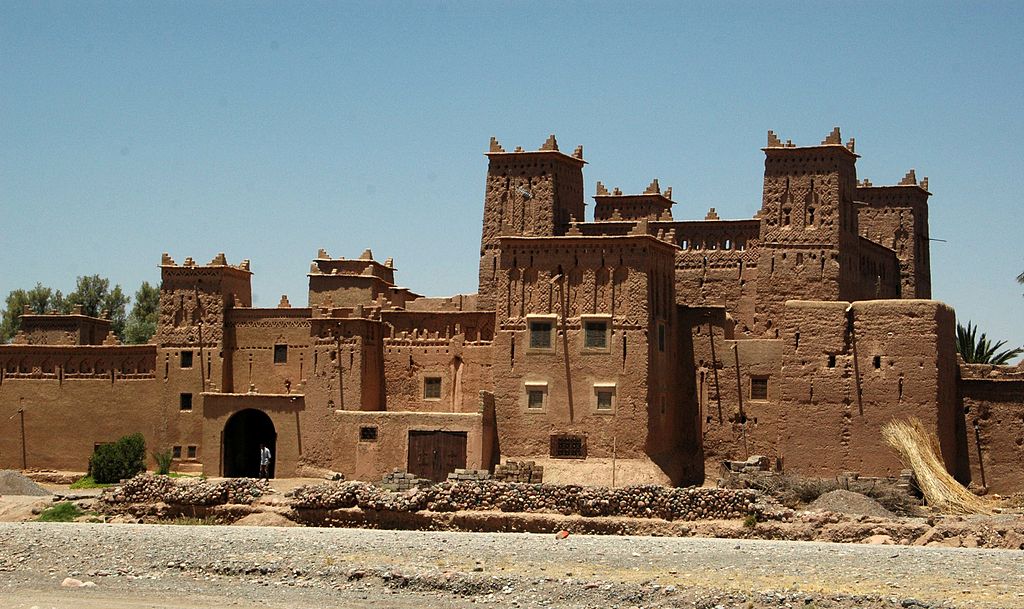 Rammed earth structures in Morocco by Maureen from Buffalo, USA (Amerhidil Qasbah) [CC BY 2.0 (https://creativecommons.org/licenses/by/2.0)], via Wikimedia Commons) Do you enjoy The Mud Home?
If you find these articles inspiring or useful please consider joining us on Patreon. Your support pays for the running of this website, my virtual help, and my sustenance. A big thank you to all The Mud Sustainers, and everyone chipping in and keeping these posts and articles coming.
8 Comments
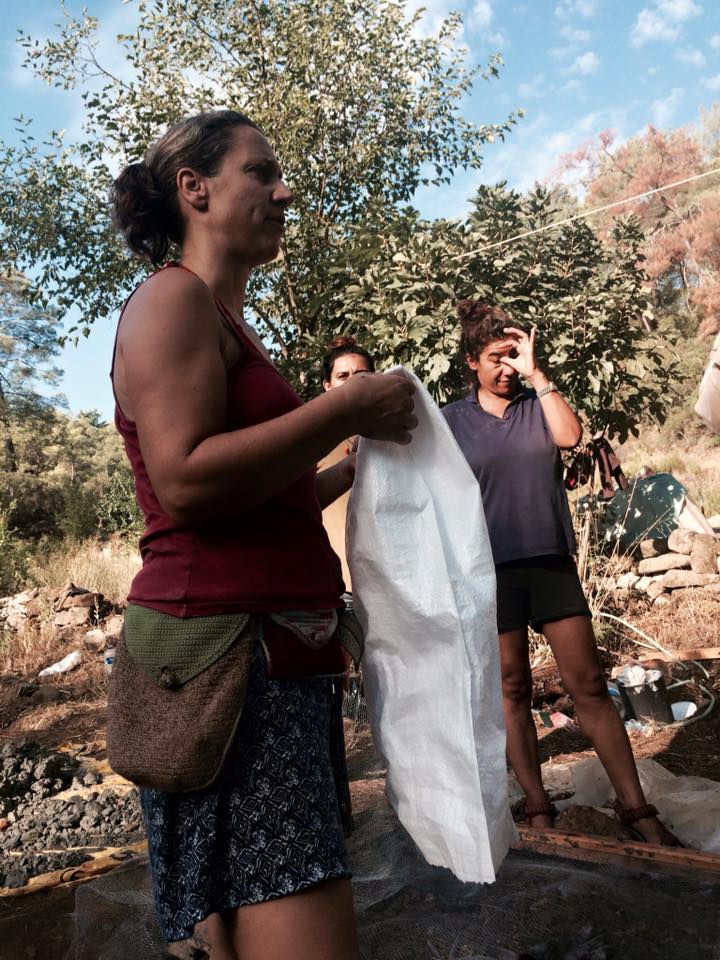
As time goes by and earthbag building becomes more practised, more and more earthbag filling techniques appear. Probably every team winds up creating their own earthbag filling system, though it will differ depending on whether you are using tubes or bags. For the record, here are a few tested ways to stuff dirt into your sacks.
BAGS 1. The Classic Single-Sack-With-Bag-Stand Routine The tried and true technique for filling earthbags, is to gusset the bottom of the bag by hand so that the corners are turned in. Then you fill the first 10-15 cm with damp earth, tamp it so that the bottom of the bag is nice and square, before filling the rest of the bag. 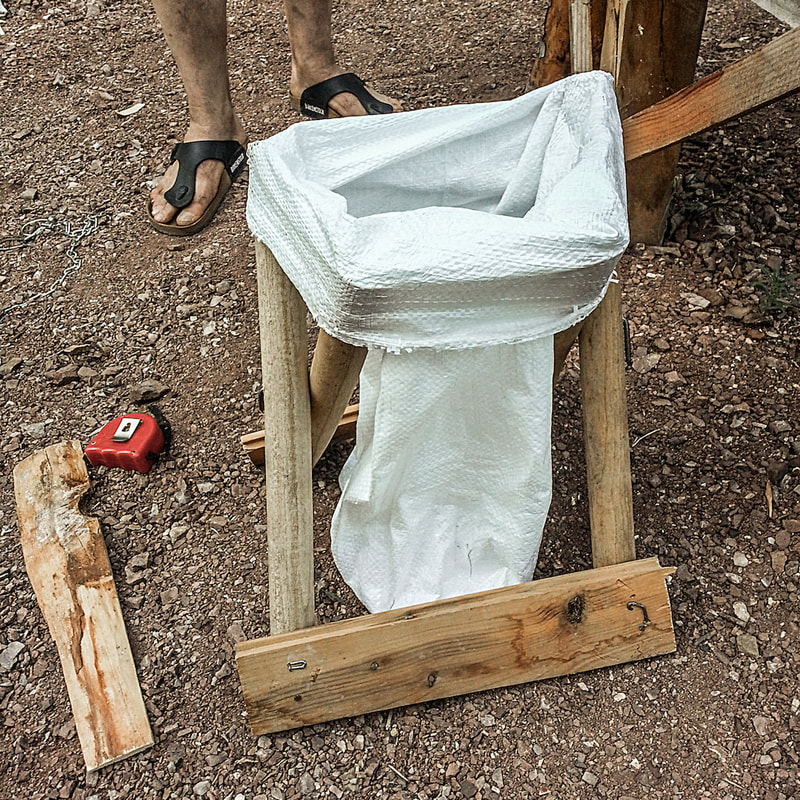
A bag stand makes filling sacks a lot easier
You would normally measure the amount of earth that goes in the bag (using pots of some description or shovel-loads), this way you can adjust the bag size, so that your earthbags sit staggered in the wall like bricks.
In truth, you don’t have to too neurotic about the exact amount of earth in the bag. But the amount does need to be fairly consistent, so that when you tamp the bags flat, they are squashed to roughly the same level. 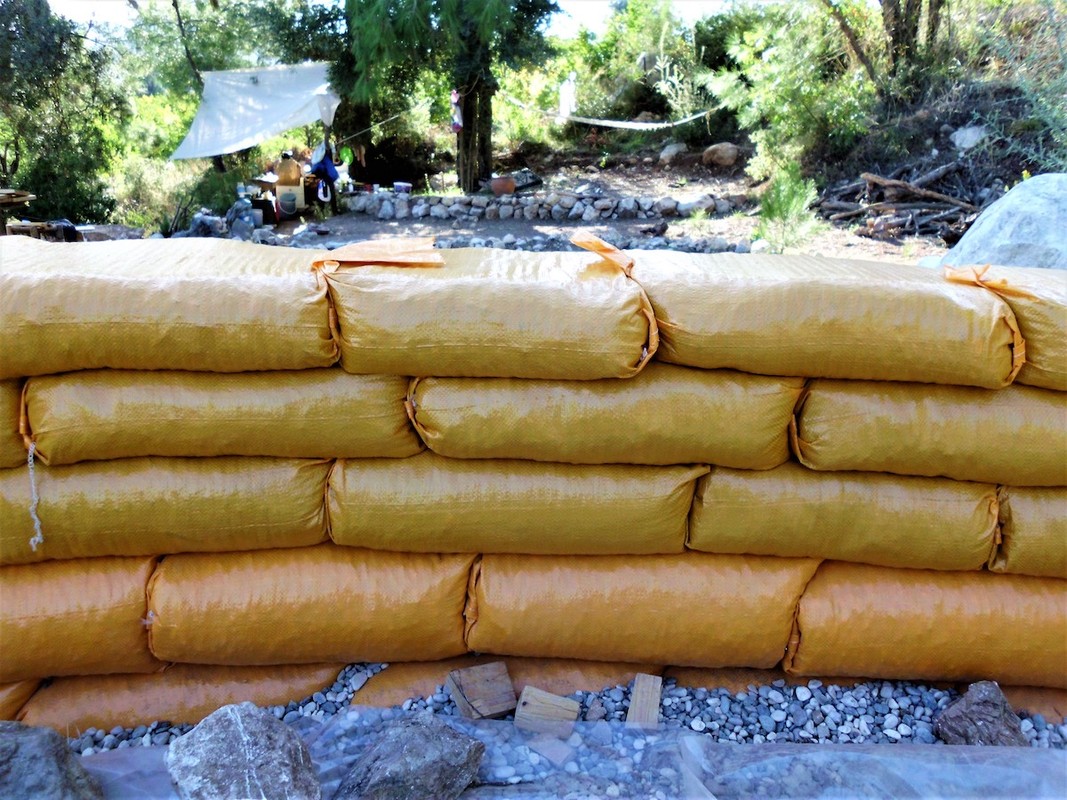
Earthbags need to be staggered on the wall
Why gusset the sacks? Because if you don’t, the corners stick out in the wall creating a very bumpy finish. This isn’t the end of the world and certainly not a structural issue, but it’s a devil to plaster over. So you’ll save yourself a lot of effort in the long run by making sure your sack-ends sit nice and flush.
Folding the ends of the sacks in before you fill will save you effort in the long run
2. The Alternative Sack Fill
In our last workshop in Turkey, we invented another bag-laying technique which allowed us to pre-fill a lot of sacks with dry earth, and then wet them on the wall. Details of that method are outlined here. 3. The Six-at-a-Time Multi-Fill Naturally, people get impatient with the one-at-a-time bag stand routine. So they invent other, faster ways of filling multiple bags at once. Sometimes they’ll even resort to child labour. :)
4. Industrial Speed Filling
For those who love machines, this tractor earthbag-filling system is going to be the clear winner. The sack tie-up at the end is the icing on the cake. Personally, I would hate the fumes and noise. For me, the whole point of building your own home is to enjoy the teamwork process. But I accept I’m in the minority there.
TUBES
Filling tubes is a little different from individual sacks, as you inevitably have to fill on the wall. Here are a couple of options: 1. Nice and Leisurely Jehane Rucquoi and friends take things in their stride with this relaxed technique.
2. The Earthbag Boa-Contraption
Here is another system using a nifty wooden frame that squashes the earthbag flat as it goes. It bears a passing resemblance to a massive earthbag snake, which is totally besides the point, but anyway.
THERE’S NO SINGLE RIGHT ANSWER
It really is pretty much down to you and your team as to which technique you prefer, and no doubt there are many others out there that I haven’t yet heard of. Feel free to tell us about, or add a link to, your own method in the comments. I always like to learn a new way. 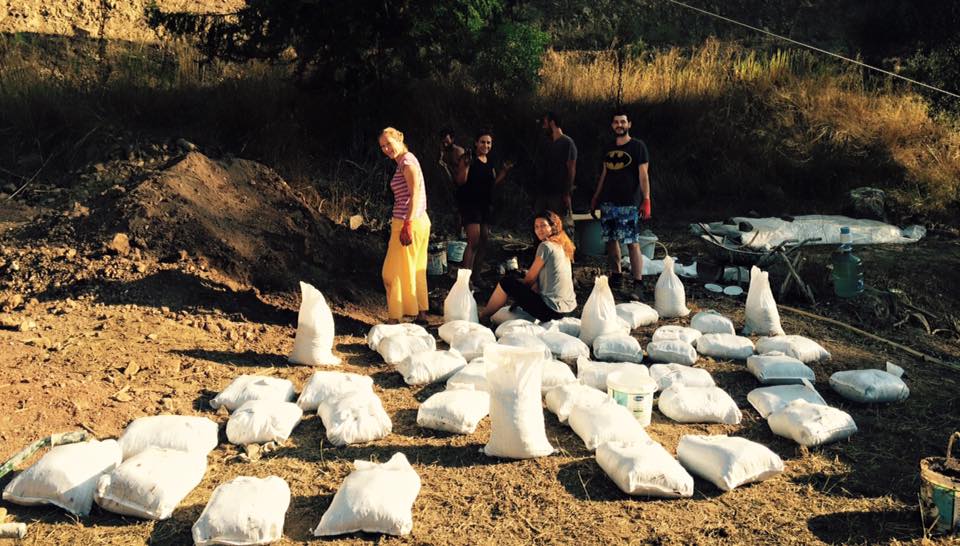
The Olympos dirt team and their pre-filled bags
Do you enjoy The Mud Home?
If you find these articles inspiring or useful please consider joining us on Patreon. Your support pays for the running of this website, my virtual help, and my sustenance. A big thank you to all The Mud Sustainers, and everyone chipping in and keeping these posts and articles coming. |
Many thanks to the Mud Sustainers supporting this site!

Do you find The Mud Home valuable? Please consider supporting the blog on Patreon. For as little as $2 a month (not even a coffee where I'm from), you can join the club.
BENEFITS FOR PATRONS INCLUDE:
Email priority, private Facebook group, review copies of my books, sneak previews of courses and books, Q and As, priority for courses and more. AuthorAtulya K Bingham 
"Beautifully written and inspiring." The Owner Builder Magazine
FREE!
If you want the step by step guide of how I built my house, sign up for the PDF.
WHY NOT? IT'S FREE! Categories
All
All the Mud Home How-to posts have been compiled into a PDF package with 75 articles and over 200 photos. You can still buy it now, and enjoy lifetime access to all the updates.
“Entranced! Be inspired by one who’s lived and breathed dirt.”
Kim Fraser, Get Rugged |
|

|
The Mud Home takes many hours a week to run, and costs a lot to sustain. If you find this site useful or inspiring, please consider supporting it so that it can continue.

Many thanks to all those who've already become Mud Sustainers.
|
 RSS Feed